360 product photography is one of the most effective product presentation techniques in e-commerce. Instead of 2-3 static images, the buyer sees an interactive spin view and can examine the item from every angle. The data speaks for itself - shops implementing 360 degree product images see a conversion increase of 22-40% and a 50% drop in returns.
63% of online shoppers prefer a 360 view before making a purchase decision. Despite this, most online retailers still rely on static packshots. That is a massive opportunity - both for product photographers and for e-commerce owners looking for a competitive edge in the UK market.
In this guide you will learn exactly what 360 product photography is, how to do it yourself (DIY product photography from just 7 GBP) or professionally, what equipment you need, how much it costs and when it pays off. Everything from the perspective of a product photography studio that shoots 360 sessions every day.
What is 360 product photography
360 degree product images are a series of individual photographs taken at consecutive angles around a product, combined into an interactive spin view. A standard 360 presentation consists of 24 to 72 images captured at equal angular intervals - for example, 36 images every 10 degrees or 72 images every 5 degrees.

The buyer sees an interactive element on the shop page that they can rotate with a mouse or finger on mobile. This is a fundamental difference compared to static packshots - the customer decides which side of the product they want to view.
360 photography is not video - it is a series of images combined into an interactive view that the buyer controls themselves.
Why 360 product photography boosts sales - statistics
E-commerce market data clearly confirms the effectiveness of 360 product photography:
- 22-40% conversion increase - shops with 360 view vs static images (Practical Ecommerce)
- +35% add-to-basket rate - shoppers add products to their basket more frequently
- -50% returns - customers know what they are buying because they have seen the product from every angle
- 63% of buyers prefer the 360 view before purchasing
- +27% longer time spent on the product page
These statistics explain why brands like Nike, IKEA, Samsung and John Lewis invest in 360 presentations as standard. At marszalstudio we see this trend among UK clients as well - more and more enquiries are specifically about 360 degree product images rather than classic packshots.
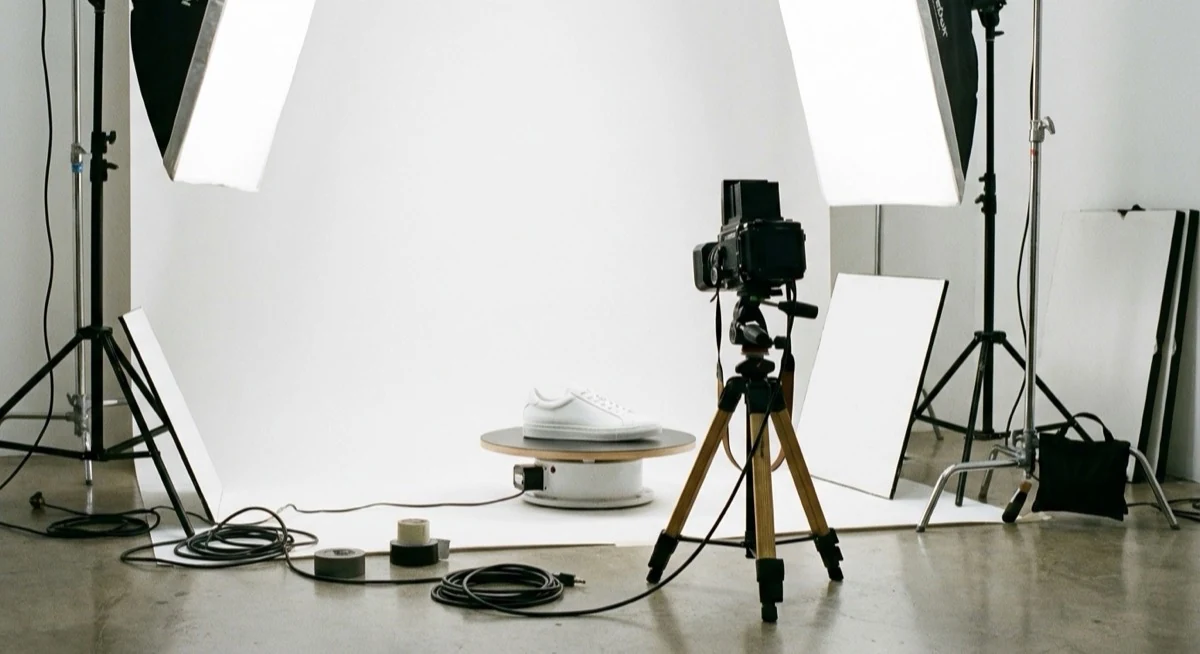
How to shoot 360 product photography - equipment and setup
The process of creating 360 product photography requires three elements: a product photography turntable, a camera (or phone) on a tripod and even lighting. Below are three setup levels - from DIY product photography to professional studio.

Product photography turntable - the heart of the setup
The product must rotate at equal angular intervals. Options from cheapest to most expensive:

| Solution | Price | Accuracy | Best for |
|---|---|---|---|
| Lazy Susan (IKEA) | 7-10 GBP | Low (manual rotation) | Testing, hobby, single products |
| Rotating tray with markings | 15-30 GBP | Medium (markers every 10 degrees) | Small e-commerce, handmade |
| Motorised turntable | 75-280 GBP | High (stepper controller) | Regular e-commerce |
| Orbitvu / PhotoRobot | 2,800-15,000 GBP | Perfect (fully automatic) | Studios, large e-commerce |
For your first attempts, a lazy Susan for 7 GBP with hand-applied markers every 10 degrees (36 positions) is enough. For regular production, a motorised product photography turntable with a controller (around 150-280 GBP) pays for itself after just a few sessions.
Camera and tripod
The camera must remain on a tripod in an unchanged position throughout the entire session. Every vibration is visible in the final animation as a jump. Set manual mode - ISO, aperture (f/8-f/13 for depth of field), shutter speed and white balance must be identical across all images. Learn more about focus stacking and sharpness.

A smartphone works too - as long as you have a tripod with a phone mount and a manual mode app (e.g. ProCam, Halide, Open Camera). The key is to lock exposure and white balance so they do not change between shots.
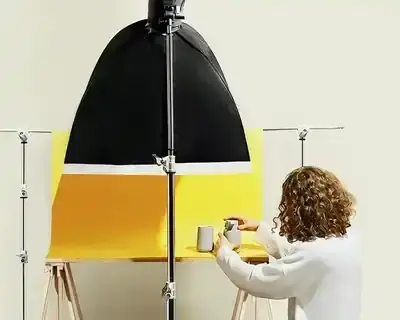
Lighting
Lighting for 360 product photography must be even from all sides - otherwise the product will be brighter on one side and darker on the other, creating flicker in the animation. Minimum two softboxes on the sides plus one from above. Natural light does NOT work - it changes during the session and produces uneven illumination. More about techniques in our guide on product photography lighting.
360 product photography step by step - the process
1. Preparing the product
Clean the product thoroughly - every stain, dust particle or fingerprint will be visible in close-ups. Centre the product on the turntable. Use a laser or grid overlay in the viewfinder to make sure the product is exactly on the rotation axis. If the product shifts during rotation - secure it with adhesive putty or mounting tack (retouch later).
2. Camera settings
Position the camera on a tripod at the centre height of the product. Manual mode: aperture f/8-f/13 (depth of field), ISO 100-200 (minimum noise), white balance manual (not auto!). Lock manual focus on the product. Attach a cable release or use a 2-second timer - so you do not touch the camera.
3. Shooting the series
Rotate the turntable by 10 degrees after each shot (36 images for a full rotation). With a motorised turntable - set automatic rotation + camera trigger. With a manual one - use the angular scale and rotate precisely. Do not move the camera between shots. Do not change exposure settings. Every inconsistency is visible in the animation.

4. Post-production
Process all images identically - same colour profile, same crop, same background removal. In Lightroom use "Sync settings" to copy edits across all frames at once. Export to JPEG, 1500-2000 px, sequential file names (001.jpg, 002.jpg... 036.jpg).
5. Publishing - the 360 product viewer
To display 360 images on your website you need a 360 product viewer - a JavaScript script that combines images into an interactive spin. Popular options:

- Sirv - SaaS, from 15 GBP/month, hosting + viewer, WooCommerce/Shopify integration
- WebRotate 360 - one-off licence around 65 GBP, self-hosted
- Orbitvu SUN - free viewer (account required), professional quality
- Magic 360 (Magic Toolbox) - e-commerce platform plugin, from around 55 GBP
- A-Frame / Three.js - open source, requires coding
How much does 360 product photography cost - pricing
Costs depend on your approach - DIY product photography, outsourcing to a studio, or automation:

| Option | Startup cost | Cost per product | Quality |
|---|---|---|---|
| DIY (lazy Susan + phone) | 10-40 GBP | 0 GBP (your time) | Basic |
| DIY (motorised turntable + camera) | 380-950 GBP | 0 GBP (your time) | Good |
| Photography studio (outsourced) | 0 GBP | 15-55 GBP per product | Professional |
| Automation (Orbitvu) | 2,800-15,000 GBP | 1-3 GBP per product | Perfect |
For a small shop with 20-50 products - outsourcing to a studio (15-55 GBP per product) is the most sensible option. With a catalogue of 500+ products and regular updates - investing in a motorised turntable pays for itself within 3-6 months. Check our product photography pricing.
Which products benefit most from 360 product photography
Not every product needs a 360 view. Here are the categories where this technique delivers the highest return on investment:

- Footwear - buyers want to see the sole, profile, heel and toe from every angle. 360 eliminates 80% of appearance-related questions
- Electronics - connectors, buttons, ports from every side. Smartphones, laptops, headphones
- Toys - complex shapes, many details, parents want to see the product thoroughly
- Jewellery and watches - shine, reflections, clasp details visible only at certain angles
- Furniture and home decor - proportions, back panel, folding mechanisms
- Industrial parts - complex geometry, holes, threads visible only from specific angles
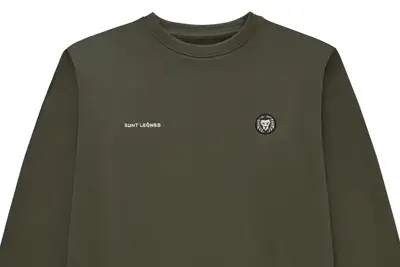
Flat products (books, posters, folded clothing) do not gain much from a 360 view. For apparel, photography on a model or mannequin from several angles works better.
360 photography vs packshot vs video - comparison
| Criterion | Packshot (static) | 360 product photography | Product video |
|---|---|---|---|
| Interactivity | None | Full (mouse drag spin) | None (playback only) |
| Cost per product | 4-15 GBP | 15-55 GBP | 40-190 GBP |
| Production time | 5-15 min | 15-45 min | 1-4 hours |
| Conversion increase | Baseline | +22-40% | +20-30% |
| File size | 100-500 KB | 2-10 MB (36 images) | 10-100 MB |
| SEO | Alt text, sitemap | Limited (JS-based) | YouTube, Schema |
| Implementation complexity | Minimal | Medium (viewer needed) | Minimal (embed) |
The best approach is a combination: packshot as the main image (SEO, fast loading) + 360 view as an interactive element on the product page + short video for social media. The best-performing shops combine all three formats - packshot for search engines, 360 for the product page, video for social media.
DIY product photography for 360 - creative solutions and tricks
You do not need to spend thousands on equipment. Here are proven, creative ways to create 360 degree product images at home - some of them might surprise you.
Lazy Susan + protractor printed on paper
The cheapest setup in the world. Buy a rotating tray (IKEA SNUDDA for about 7 GBP or any lazy Susan). Print a 360-degree protractor on A4 paper (free templates: search "360 degree protractor printable"), attach it to the tray and mark 36 positions every 10 degrees. Stick an arrow pointer on the table next to the tray - and you have a precision system for under 10 GBP.

Kitchen timer as a rotating motor
An old mechanical kitchen timer has a built-in rotating mechanism. Attach a lightweight cardboard disc on top - you have a motorised turntable for 0 GBP. It rotates continuously, so instead of synchronising the shutter trigger - record video and export frames at equal intervals. Unconventional, but it works for lightweight products up to 500g.

4K video instead of 36 individual photos
Instead of taking 36 separate photos - record a 4K video with slow, even product rotation (about 12 seconds for a full turn). Then export frames with FFmpeg (free): ffmpeg -i video.mp4 -vf "select=not(mod(n\,10))" -vsync vfr frame_%03d.jpg. At 30fps and 12 seconds = 36 frames. Quality is lower than RAW photos, but sufficient for testing and smaller products.

Arduino + stepper motor = automated product photography turntable for 28 GBP
For the tinkerers: Arduino Uno (~8 GBP) + NEMA 17 stepper motor (~7 GBP) + A4988 driver (~2 GBP) + a rotating disc. Total cost: 20-28 GBP. Arduino rotates the platform exactly 10 degrees, waits 2 seconds for the camera trigger, rotates again. Ready-made code is available on GitHub (search "arduino turntable 360 photography"). A weekend project, and the turntable serves you for years.

Bluetooth remote instead of touching your phone
A cheap Bluetooth shutter remote (~3 GBP on Amazon UK) eliminates vibrations from tapping the phone screen. Set your phone on a tripod in manual mode, lock exposure and focus, then trigger with the remote after each rotation. On iPhone: ProCamera. On Android: Open Camera (free) - both allow you to lock all parameters.

Light tent + lazy Susan = complete studio for 40 GBP
Combine a light tent (12-28 GBP) with a lazy Susan inside. The tent provides even lighting from all sides - critical for 360 because it eliminates flicker. Add an LED strip for 8 GBP and you have a complete DIY product photography studio for a total of 28-40 GBP. This setup delivers results close to professional turntables costing 950+ GBP.

Free 360 product viewers for your website
You do not need to pay for a viewer to embed on your site:

- Sirv (free plan) - 500 MB storage, drag-to-spin viewer, WordPress integration with a single shortcode
- Modelviewer (Google) - open source, WebXR ready, supports 3D models and image sequences
- 360-image-viewer (npm) - lightweight JavaScript, 5 KB, zero dependencies, self-hosted
- WP 360 Product Viewer - free WordPress plugin, drag-and-drop upload
Pro tip: Start with 24 images instead of 36. For smaller products (watches, electronics) the smoothness difference is minimal, and the file size is 33% smaller - so your page loads faster.
5 common mistakes in 360 product photography


- Uneven lighting - the product is brighter on one side. In the animation this looks like flicker. Use at least 2 lights symmetrically
- Off-centre rotation axis - the product is not on the axis of rotation, it "jumps" in the animation. Centre it precisely before the session
- Changing camera settings - auto-ISO, auto-WB, autofocus change between frames. Use fully manual mode
- Too few images - 12 images (every 30 degrees) produce a jerky spin. Minimum 24, optimally 36
- No background retouching - the turntable, cables, markers visible in the images. Always remove the background in post-production
Summary
360 product photography is an investment that directly translates into sales. With a conversion increase of 22-40% and returns cut in half - the ROI is clear.
- Start with a test - a lazy Susan for 7 GBP and a phone are enough to assess the potential
- 36 images every 10 degrees - the optimal balance between smoothness and file size
- Full manual mode - lock ISO, WB, focus and exposure at identical values
- Even lighting - minimum 2 softboxes symmetrically, never natural light
- 360 product viewer on the page - without it the images are just a series of files. Sirv, Magic 360 or WebRotate
If you are looking for professional 360 degree product images for your shop, check our packshot photography services - professional packshots are the ideal foundation for creating 360 presentations.
Need professional product photos as a base for 360 presentations? Get in touch with marszalstudio - we deliver packshot and lifestyle sessions for e-commerce.