Jewelry photography is one of the most technically demanding disciplines in product photography. A ring worth $3,000 can look like costume jewelry from a discount bin - or it can stop a buyer mid-scroll. The difference is not the piece itself. It's lighting physics, macro technique, reflection control, and knowing exactly what Amazon, Etsy, and Shopify demand from your images. In this guide, I'll walk you through how to photograph jewelry professionally: equipment, lighting setups, platform requirements, post-production, and the AI tools reshaping the workflow in 2026.

Why Jewelry Photography Is Uniquely Challenging
Jewelry combines three characteristics that create maximum difficulty for photographers. First, the surfaces are intensely reflective - gold, silver, and platinum bounce light in every direction, including straight back into your lens as glare. Second, the subjects are extremely small - a 3mm gemstone setting or 0.5mm milgrain border requires true macro magnification to capture. Third, buyers expect to verify quality before purchasing - a blurry or overexposed shot kills conversions, regardless of how beautiful the piece actually is.
Understanding these three constraints shapes every decision you make when learning how to photograph jewelry: which lens you choose, how you position your lights, what aperture you set, and how much time you spend in post-production. Let's work through each systematically.
1. Equipment: Macro Lenses and Essential Gear
The single most important piece of equipment for how to photograph jewelry is a true macro lens. Standard kit lenses and portrait lenses cannot achieve the 1:1 magnification ratio required to render a small ring sharply across its full face. Macro lenses project the subject life-sized onto your camera sensor - which, at full resolution, gives you the pixel density for customer zoom on any e-commerce platform.
Choosing the Right Focal Length
Two focal lengths dominate professional jewelry photography:
| Focal Length | Best For | Approximate Cost | Working Distance |
|---|---|---|---|
| 60mm macro | Compact studio setups, tight working area, flat jewelry (brooches, pendants) | $400-$600 | ~18 cm at 1:1 |
| 100-105mm macro | Professional standard - rings, necklaces, earrings; more room for lighting rigs | $800-$1,200 | ~30 cm at 1:1 |
The 100-105mm range is the professional standard for how to photograph jewelry: the extra working distance means your lighting setup fits between the lens and the subject without casting shadows. For small studio setups or tabletop configurations, 60mm works well but demands more precise light placement.
Tripod and Camera Stability
At 1:1 macro magnification, even a 1mm camera movement produces severe blur. A sturdy tripod with a ball head is non-negotiable. Use either a remote shutter release or your camera's 2-second timer to eliminate vibration from pressing the shutter button. Mirror lock-up (on DSLRs) adds another layer of stability for the sharpest possible captures.
Smartphones: When They Work and When They Don't
Modern iPhones and Android flagships can produce acceptable results when you need to know how to photograph jewelry on a budget in well-controlled light, thanks to computational photography and dedicated macro modes. The limitation is magnification ceiling: phone cameras cannot match true 1:1 macro for fine metalwork detail. For Etsy sellers just starting out, a phone on a tripod with a proper light tent is a viable entry point. For Amazon, luxury e-commerce, or catalog work, dedicated macro lenses remain superior.
Check Also:
2. Lighting for Jewelry: Mastering Reflective Surfaces
Lighting is where most photographers struggle with how to photograph jewelry. The fundamental physics: the angle of incidence equals the angle of reflection. Point a hard light at a polished ring from the wrong angle and it bounces directly back into your lens as a blown-out white flare, hiding every detail underneath. The entire goal of jewelry lighting is to control where reflections go.
Soft, Diffused Light as Your Foundation
The larger the light source relative to the subject, the softer the reflection. For jewelry, this means:
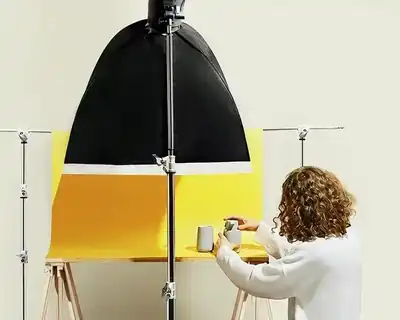
- Light tents / softboxes - wrap the piece in diffused illumination from multiple angles simultaneously. Ideal for rings, pendants, and bracelets.
- White acrylic diffusion tunnels - surround the jewelry entirely, creating a 360-degree soft-box effect. Eliminates most hotspots on polished surfaces.
- Single large softbox + bounce card - position main light at 45 degrees to the surface; use white foam board opposite to fill shadow side.
Soft, diffused light lets gemstones sparkle naturally without the harsh glare that kills detail. It's the answer to the most common question photographers ask when learning how to photograph jewelry: "why does my ring look flat in photos?" - the light source is too small and too direct.
The 45-Degree Rule for Reflection Control
Position your main light source at approximately 45 degrees to the jewelry's primary reflective surface. At this angle, specular reflections bounce away from the camera lens rather than into it. This is the single most effective change most beginners learning how to photograph jewelry can make - before buying any new equipment.

Polarizing Filters: Your Glare Elimination Tool
A circular polarizing filter on the lens cuts metallic surface glare that even perfect light positioning cannot fully eliminate. Combined with polarizing gels on your light sources (cross-polarization technique), you can reduce reflections on gold and silver dramatically. It's standard equipment in professional jewelry studios - non-destructive, reversible, and effective.
When to Use Sharper Light
Soft light is the default, but sharper, more directional light has its place. For engraved surfaces, textured metalwork, or frosted finishes, a harder light source raking across the surface at a shallow angle brings out texture dramatically. A single strip softbox from the side, positioned almost parallel to the piece, creates the "texture reveal" lighting used in luxury watch and coin photography. The key is intentionality: choose your light quality based on what you want to emphasize.
Camera Settings for Jewelry
In controlled studio lighting, these settings deliver consistent results:
- Aperture: f/8-f/16 - maximizes depth of field to keep entire piece sharp
- ISO: 100-400 - keeps noise minimal; studio lighting provides enough exposure at low ISO
- Shutter speed: 1/60-1/125 sec on tripod (slower possible with remote release)
- White balance: Custom, using a grey card - critical for accurate gold, silver, and platinum tones
Also check out:
3. Choosing the Right Background and Composition
After securing a defect-free piece and establishing your lighting, background and composition are the next crucial variables in how to photograph jewelry effectively. The baseline is a clean, neutral background - but understanding why this works (and when to break the rule) will make you a better photographer.
Neutral Backgrounds for Maximum Product Focus
White, light grey, and black are the three dominant background choices in professional jewelry photography, each with distinct logic:
- White: Amazon standard; maximizes contrast with dark metals; shows gemstone color accurately; required for most major marketplace primary images.
- Light grey: More forgiving for white metals (silver, white gold, platinum) that can disappear against pure white; preferred for catalog photography.
- Black: Growing in the 2026 luxury segment; creates dramatic contrast for gold and colored gemstones; negative space becomes a design element.
Find out more:
Selecting a Scratch-Free Piece
Before any shot, inspect your piece under magnification - a jeweler's loupe or 10x magnifying glass is standard. At macro magnification, a hairline scratch on a ring shank that's invisible to the naked eye becomes a prominent feature in the photo. If you're selecting from multiple pieces, choose the one in best condition. Clean all surfaces with appropriate jewelry cleaner; handle with cotton gloves to prevent new fingerprints.
Composition Principles That Work
Jewelry photography composition follows three core principles. Negative space - let the piece breathe; overcrowding creates visual tension that distracts from the product. Intentional angle - for rings, a 45-degree elevated angle shows the stone and the shank in a single frame; for necklaces, flat-lay with tension in the chain reads more elegantly than a collapsed pile. Multiple angles - front, back, profile, and macro detail are all required; buyers want to verify construction, hallmarks, and stone setting quality.

4. Macro Focus and Capturing Fine Detail
Focus is arguably the most technically demanding aspect of how to photograph jewelry. At 1:1 macro, the depth of field at f/8 can be as shallow as 2-3mm - meaning a ring tilted slightly can have the front edge sharp and the back of the shank blurred. Here's how professional jewelry photographers handle this.
Manual Focus for Precision Control
At extreme macro distances, autofocus hunts - it cannot reliably lock onto the specific plane you want sharp. Switch to manual focus and use your camera's live view zoom (or focus peaking if available) to precisely target the critical detail: the primary gemstone, the engraved surface, the hallmark. Small adjustments matter enormously at this magnification.
Focus Stacking for Maximum Depth of Field
For three-dimensional pieces - rings, brooches, sculptural pendants - a single exposure at any aperture cannot keep the entire piece sharp while maintaining image quality. The professional solution is focus stacking: capture a series of shots at different focus distances (from front to back of the piece), then merge them in Photoshop or Helicon Focus to create a composite image that is sharp throughout. This technique is standard in high-end jewelry catalog photography.
Check Also:
- The bokeh effect - depth of field in product photography
- SLR cameras for beginners - what to look for
Macro Photography Techniques - Step by Step
- Mount camera on tripod - absolutely essential; any hand movement at 1:1 magnification results in unusable blur.
- Set aperture to f/8-f/11 - balances depth of field with optical sharpness. Avoid f/16+ with most macro lenses due to diffraction softening.
- Switch to manual focus - use live view magnification to lock onto the critical plane.
- Use remote shutter or 2-second timer - eliminates camera shake from button press.
- Bracket focus positions - if stacking, capture 5-15 frames advancing focus in small increments front-to-back.
Note on aperture and depth of field: a narrower aperture (f/16, f/22) increases depth of field but introduces diffraction softening that degrades overall sharpness. The sweet spot for most macro lenses is f/8-f/11. For subjects requiring more depth, focus stacking outperforms stopping down.

5. Platform Requirements: Amazon, Etsy & Shopify in 2026
Knowing how to photograph jewelry technically - lenses, lighting, macro focus - is only half the work. Each major e-commerce platform has specific image requirements, and non-compliance means your images get rejected or perform poorly in search ranking. Here's what each platform demands in 2026:
| Requirement | Amazon | Etsy | Shopify |
|---|---|---|---|
| Minimum Resolution | 2000px (longest side) | 2000px (shortest side) | 2000×2000px recommended |
| Aspect Ratio | 1:1 (primary image) | 1:1 (recommended) | 1:1 (product grid) |
| Format | JPG, PNG, TIFF, GIF | JPG, PNG, GIF | JPG, PNG, GIF, WebP |
| Background (primary) | White/light - strict | Creative allowed | Full creative control |
| Multiple images | Up to 9 secondary | Up to 10 listing images | Unlimited |
| File size | Optimize for load speed | <1MB recommended | <500KB recommended |
Amazon enforces the strictest consistency: clean product shots on white or plain light backgrounds are non-negotiable for primary images. Etsy rewards creative visual storytelling - lifestyle context, styled flat-lays, and handmade aesthetic are actively rewarded by the platform's search algorithm. Shopify gives you complete flexibility, allowing you to blend technical product shots with lifestyle imagery across the same listing.
For all three platforms, high resolution is the most important technical spec - it enables the zoom functionality that lets buyers inspect craftsmanship before purchasing. A 2000px image is the minimum; 3000-4000px gives you more room for cropping and platform optimization.
Find out more:
6. Post-Production: What Professional Jewelry Retouching Actually Involves
Post-production is where raw captures become sellable product images. When you learn how to photograph jewelry professionally, you quickly discover that the editing process is more exacting than most product categories - each piece has unique reflections, color shifts, and surface details that need individual attention. Here's the professional workflow:
White Balance and Color Accuracy
White balance correction is the first step. Gold that shoots warm under tungsten light needs cooling to match its actual color; white gold or platinum must read neutral, not blue or yellow. Use the grey card reading you took during the shoot as your reference, then fine-tune with selective color adjustments for each metal type.
Brightness, Contrast, and Exposure Refinement
Adjust exposure and contrast to ensure the piece reads correctly across different screens and output formats. The goal is accurate representation - not artificially brightened or over-contrasted. Buyers who receive a piece that looks different from the photo leave negative reviews and file returns.
Dust, Spot, and Imperfection Removal
Macro lenses reveal every dust particle that landed on your piece between cleaning and shooting. The healing brush and clone stamp in Photoshop or Lightroom handle these. Also: camera sensor reflections visible in polished surfaces, micro-scratches on the setting, and any debris in chain links. This is time-consuming but non-negotiable for any piece that will be sold.
Shadow Creation for Realism
Jewelry removed from its background and placed on pure white looks "floating" and unnatural. Adding a subtle drop shadow or reflection anchors the piece visually. A natural shadow (shot in-camera) is more convincing than a Photoshop drop shadow - but both serve the same purpose: giving the piece weight and context.
Gemstone Enhancement Without Fabrication
Gemstones sometimes lose brilliance in photography - the camera cannot replicate human eye perception of fire and scintillation. Selective sharpening, micro-contrast boosts, and careful saturation adjustments in the gemstone area can restore perceived sparkle without fabricating color or adding fake reflections. The line between enhancement and misrepresentation matters: buyers must receive what the photo shows.
Masking and Background Removal
For e-commerce listings requiring multiple backgrounds (white for Amazon, styled for Etsy, custom brand for Shopify), precise masking around the jewelry allows you to composite the piece onto different backgrounds from a single shoot. Use pen tool selections for hard-edged metal; Photoshop's Select Subject with manual refinement handles finer details like chain links and stone facets.
Final Adjustments: Hue, Saturation, Cropping, Consistency
Hue and saturation adjustments per metal type, final crop for platform aspect ratios, and batch consistency (all images in a catalog matching in brightness, contrast, and color temperature) complete the retouching workflow. Consistency across a product catalog signals professionalism and builds customer trust.
A practical rule: avoid over-editing. If your retouching changes the apparent color or scale of the piece, you've crossed into fabrication. Professional jewelry photography represents products accurately - which is why buyers trust and purchase from listings with professional images.
7. AI Tools for Jewelry Photography in 2026
The AI toolkit for those who want to know how to photograph jewelry efficiently has matured significantly in 2025-2026. Luxury brands including Rolex, Chanel, and Louis Vuitton now integrate AI into their photography pipelines for speed and consistency. For SMB sellers, AI tools offer the most compelling cost-benefit ratio in the market.
AI Retouching: OIS.GOLD
OIS.GOLD is a specialized AI jewelry retouching platform that completes standard retouching tasks in seconds rather than hours - a 70% time reduction per piece according to their published benchmarks. The key differentiator is material-aware rendering: the AI understands the difference between gold, silver, platinum, and gemstone surfaces and applies appropriate enhancements to each without the uniform "over-processed" look of generic AI tools.
Virtual Try-On and AI Model Generation
The cost comparison here is striking: traditional hand model + photographer day rate runs $500+ per session. AI model generation via platforms like SellerPic or Photta costs approximately $5 per image. For sellers needing lifestyle context without a model shoot budget, AI-generated models on hands, necks, and ears are a viable production alternative. Quality has improved dramatically - the best tools are trained specifically on jewelry-wearing anatomy.
AI Background and Scene Generation
Platforms like Pebblely and LightX AI generate studio-quality backgrounds optimized for jewelry from a raw product shot. The workflow: shoot your piece against white or grey, upload to the AI platform, select your background style (lifestyle scene, textured surface, branded environment), receive a composited result in minutes. For sellers managing hundreds of SKUs, this removes the biggest production bottleneck.
The honest assessment: AI tools do not replace a skilled photographer for hero images and campaign photography. But for catalog shots, variant images, and platform-specific requirements, they dramatically reduce per-image cost and turnaround time. Understanding where each tool fits in your workflow is the competitive advantage in 2026.
8. 2026 Trends in Jewelry Photography
The landscape of how to photograph jewelry is shifting in several distinct directions this year. Understanding these trends helps you position your images ahead of the competition rather than chasing it.
Macro Detail as Quality Signal
Extreme close-up photography showing milgrain tracing, prong construction, metalwork texture, and gemstone facets is moving from luxury-only to standard e-commerce practice. Buyers have become sophisticated enough to spot quality (and lack of it) at macro scale. For handmade and artisan jewelry especially, macro detail photography is non-negotiable.
Minimalist Aesthetic with Impact
The 2026 e-commerce formula is: Consistency over Creativity, Speed over Complexity, Clarity over Styling. Black backgrounds are gaining traction in the luxury segment - negative space as active design element. The trend is toward images that communicate premium positioning through restraint, not through elaborate styling.
Lifestyle Context and Narrative Photography
Studio-only product shots are increasingly being paired with contextual lifestyle images - pieces worn in real settings, styled flat-lays with meaningful props, and narrative-driven compositions that show the jewelry in the context of how it will actually be worn. On Etsy and Instagram especially, lifestyle images outperform plain product shots for engagement and click-through rates.
3D and Hybrid Digital Production
3D-rendered backgrounds composited with real product photography are becoming standard for brands that need impossible camera angles, floating gemstones, or perfectly controlled reflections that physical photography cannot achieve. The hybrid approach - shoot real product, render environment digitally - delivers the best of both worlds at competitive production cost.
How to Photograph Jewelry - Summary
Professional jewelry photography combines technical precision with a clear understanding of what buyers need to see before purchasing. The framework is consistent regardless of the piece:
- Equipment: True macro lens (100-105mm for professional work), sturdy tripod, remote shutter
- Preparation: Flawless piece, clean with appropriate agents, handle with cotton gloves
- Lighting: Diffused sources, 45-degree positioning, polarizing filter for glare control
- Camera settings: f/8-f/11, ISO 100-400, manual focus, custom white balance from grey card
- Platform specs: Minimum 2000px, square aspect ratio, white background for Amazon primary images
- Post-production: Color accuracy first, then dust removal, shadow creation, selective enhancement - no fabrication
- AI tools: Use for batch retouching and variant images; maintain professional photography for hero images
Learning how to photograph jewelry rewards patience and systematic problem-solving more than expensive gear. The photographers who consistently produce the best results are the ones who understand the physics of light and reflection - not just the ones with the largest equipment budgets. Master the fundamentals, and the results follow.
If you're working with a significant jewelry catalog and need professional results consistently, consider partnering with a specialist. At marszalstudio, jewelry photography is one of our core specializations - contact us to discuss your project.