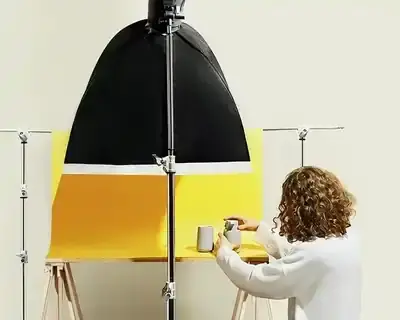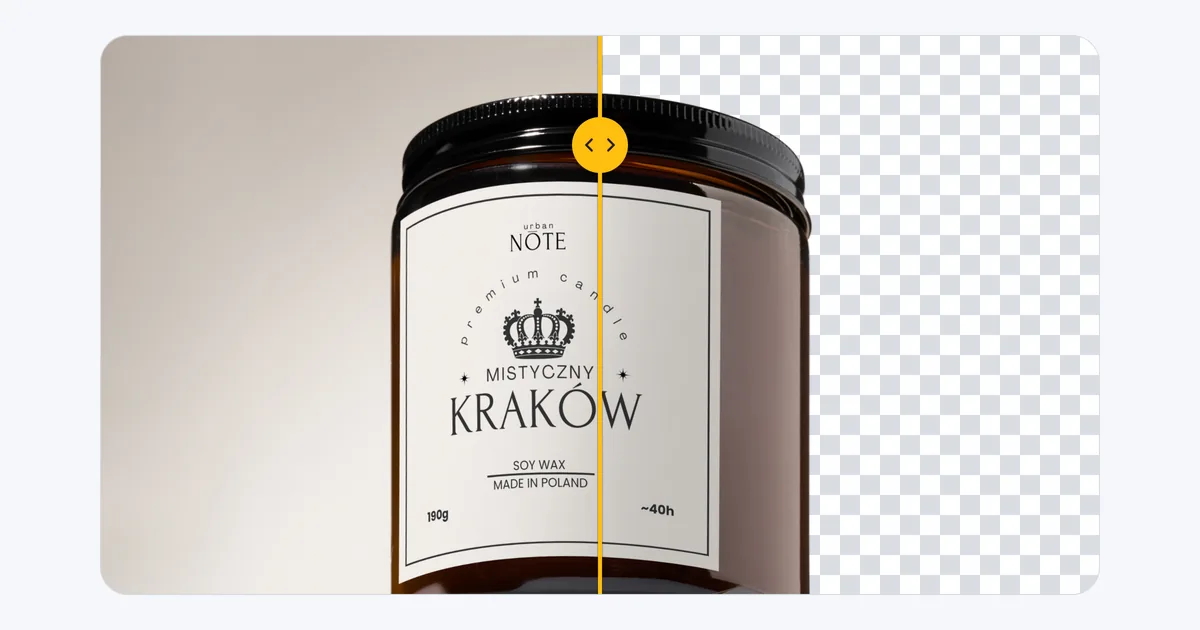
Tools that remove background from photos now do it in seconds: on a phone, in Paint or on a website. The hard part is checking whether the result is good enough for a shop. In our test on 13 product photos, the fastest free AI model left 6 times more non-white pixels next to the product than the best one (measured on 5 packshots). On five thin diffuser reeds, it kept only 27% of the reed area.
At marszalstudio we shoot products on white for online shops. Below: steps for phones and computers from the makers’ help, 11 websites and apps compared, how removing a background in ChatGPT differs from a cut-out, a before-and-after comparison from our test and a White Background Checker that runs in your browser.
Remove background from photo: pick a method for the job
Start with where the photo will go and how many like it you have. A social post forgives a soft edge; an Amazon main image needs white 255 and a clean edge.
| Goal | Simplest method | Watch out for |
|---|---|---|
| Social media graphic, presentation | phone, Windows 11 Paint or Photos, Mac Preview | a soft edge, hidden at small sizes; ChatGPT and Gemini redraw the product |
| Amazon main image | any cut-out flattened onto white 255 and checked with a threshold | a grey halo, a lost shadow, compression on saving |
| eBay, Etsy or Shopify listing | the platform’s background tool or any cut-out on white 255 | Etsy wants at least one unedited photo of the real item (when not to remove) |
| Google Shopping | Product Studio in Merchant Center or your own cut-out | generative AI images must carry metadata saying so |
| Brand colour or another photo behind | Photos in Windows 11, Photoshop, Canva, Photoroom | a generative background can redraw the product (AI backgrounds) |
| Dozens of photos or more | paid Canva plans, Picsart, Photoroom Batch, an API | free plan limits and the commercial licence |
| Logo or graphic on white | GIMP Colour to Alpha, Set Transparent Color in Word | white areas inside the logo turn transparent too |
| Print catalogue | a clipping path: Photoshop’s Pen tool or a Clipping Magic TIFF | most automatic tools give a pixel mask, not a path |
| Glass, jewellery, a white product, a series in one style | a studio shoot or retouching | where automatic tools fail most often (examples) |
Remove the background on your phone: iPhone, Samsung and Android
On a phone the cut-out takes a second, but it usually goes to the clipboard or stickers, not to a file. For a shop, paste it into an app that saves an image, or use a computer.
iPhone and iPad: touch and hold the product
- Open the photo full screen in Photos, or pause a video on the frame you want.
- Touch and hold the product until an outline appears around it.
- Tap Copy, Add Sticker or Share, or drag the subject with another finger into a document in a different app.
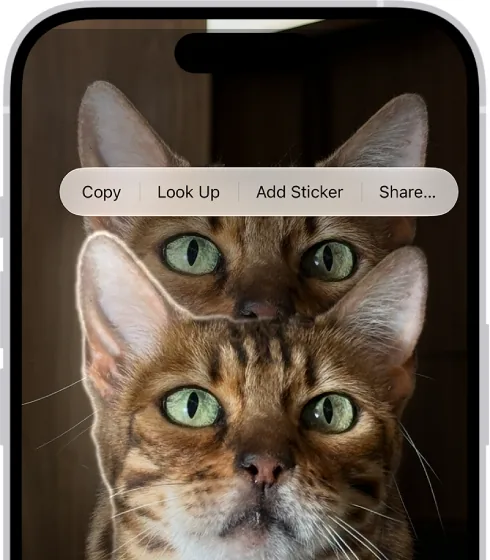
To remove the background on an iPhone, you need iOS 16 or later on an iPhone XS, XR or newer. Apple’s guide does not cover saving a PNG or putting white behind the product in Photos; the free Keynote app can (steps below). On an iPad with iPadOS 26 or later, Preview also has More > Remove Background.
Samsung Galaxy: touch and hold the subject in Gallery
Open the photo in Gallery and touch and hold the subject. Samsung calls this Image Clipper (One UI 5.1 or later, according to SamMobile). You can copy or share the cut-out, or save it as a sticker or an image. Samsung does not say whether a saved file has a transparent background, so check the result.
Google Photos and other Android phones
For Google Photos, Google’s UK help describes a sticker rather than a file: press and hold the subject, then tap Copy or Share (Android with at least 4 GB of RAM; iPhone with iOS 17 or later). Editing with Ask Photos is generative AI, announced in the UK only for Pixel 6 and newer (June 2026). A website from the table below is easier.
How to make the background white on your phone
On an iPhone, use Apple’s free Keynote app and treat a slide as a sheet of white paper:
- Create a presentation and make the slide square: More button, then Presentation Options > Presentation Setup > Slide Size > Custom.
- Select the slide, tap the Format button, then Background > Colour and pick white.
- Insert the product photo, tap it and choose Remove Background (you may have to tap Show More Items first). Drag over leftovers of the old background to remove their colour.
- Enlarge the product to about 80-85% of the slide’s longer side.
- Save: More button, then Export > Images, as JPEG or PNG.
Apple does not say whether the palette white is exactly 255 or what size the export is, so check the file in the checker further down. On Android, neither Google’s nor Samsung’s help covers a white background under the cut-out; use the marketplace’s own tool, such as White in the eBay app (overview).
To shoot a product so it is easier to cut out, see our guide on how to take photos with a phone.
Remove the background on a computer: Windows, Mac and Office
Windows 11, macOS and Office all have background removal built in. Only Photos in Windows 11 also lets you type in white as RGB values.
Windows 11: Paint
- Open the photo in Paint or paste it onto the canvas.
- Click the remove background button in the Image group on the toolbar (newer versions also have Remove background in the Copilot menu). To cut out only part of the image, select it with a rectangle first.
- Save as PNG to keep the transparency.
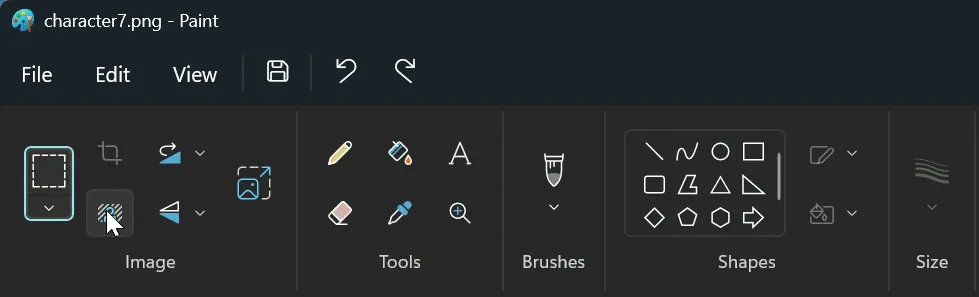
You need Paint 11.2306.30.0 or later (11.2308.18.0 for transparent PNG); a Copilot+ PC is not required. Paint 3D, still mentioned in older guides and even Office help, left the Microsoft Store on 4 November 2024. A September 2025 update, included in the October 2025 security update, also added Remove Background to the AI actions in File Explorer’s right-click menu (gradual rollout, not in the EEA).
Windows 11 Photos: white 255 typed in as numbers
- Open the photo in Photos and select Edit image (Ctrl + E).
- Select Background panel. The background is selected automatically; the Background brush adds to or removes parts of the mask.
- Select Remove (transparent) or Replace with RGB 255, 255, 255, then Apply. Blur blurs the background instead (see how to blur the background on a photo).
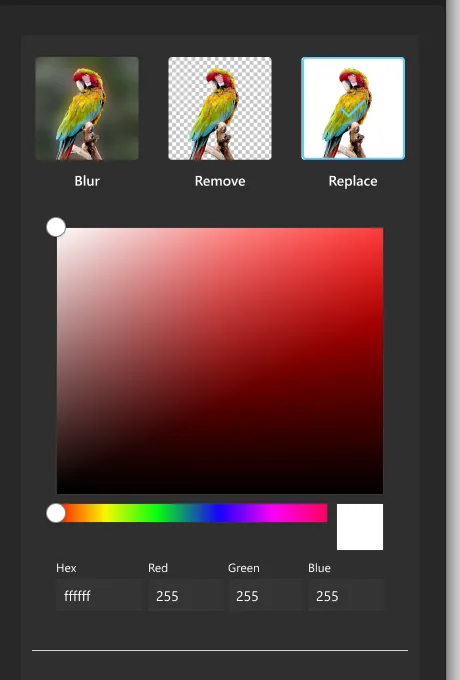
Microsoft says the separation is done locally and “your data never leaves your device”. You need Photos 2023.11110.8002.0 or later. Check the edge with a threshold anyway: the pixels next to the product blend with the new background.
Mac: Preview, Finder and Photos
- Preview (macOS 26 and later): open the image and click Remove Background. If asked to convert to PNG, click Convert, or Cancel and File > Duplicate to keep the original. For macOS 12-15 the guide describes only Instant Alpha: drag over the background to select similar adjacent pixels.
- Finder: Control-click the file and choose Quick Actions > More > Remove Background. In the macOS 15 and 26 guides it is a Finder extension you add first (Quick Actions > Customise).
- Photos (macOS 13 and later): Control-click the photo and choose Copy Subject (from macOS 15 also Share Subject).
Word, PowerPoint and Excel
- Select the picture and choose Picture Format > Remove Background. The area to be removed turns magenta.
- Fix the mask with Mark Areas to Keep and Mark Areas to Remove, then select Keep Changes.
- For a separate file, right-click the picture and choose Save as Picture.
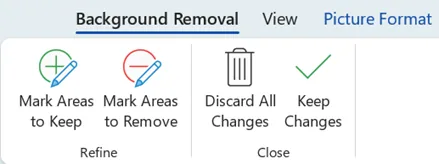
It works in Microsoft 365 and Office 2021 and 2024 on Windows and Mac. Office on the web is not listed, and for vector graphics (SVG, AI, WMF, DRW) the button is greyed out.
Background remover apps and websites: 11 tools in one table
When you choose a website to remove the background from a photo, check three things: the free plan limit, whether you may sell with the result, and what happens to your photo. Facts come from the makers’ pricing pages, help, terms and site code, plus our own checks, each dated. There are no “x/10” scores: we could not test these sites automatically, so our quality measurements cover open AI models (test section).
Short answer: for a free photo you may sell, use Pixlr or iLoveIMG; for batches, a paid Canva or Photoroom plan (details below).
| Tool | Free plan | Free: size and watermark | Free: photos for selling | Cheapest paid plan |
|---|---|---|---|---|
| Canva | limited free HD downloads; bulk and transparent PNG paid | file under 9 MB, result capped at 10 MP | terms: you own your content and AI output | Pro £12.99 a month, £99.99 a year (App Store UK) |
| Photoroom | with an account; 25 exports a week, 100 a month | browser export up to 2000 × 2000 px, no watermark | no: personal use only | PRO from £4.99 (App Store UK); web $12.99 a month |
| Adobe Express (now Adobe Firefly) | Adobe account; free daily generations | uploads up to 50 MB; output and watermark not stated | yes for generative AI output “in general”, not for beta features | £8.99 a month (App Store UK); Premium £9.98 a month (adobe.com/uk) |
| Picsart | 7-day trial only, though the page title says “free” | no free plan for this tool | terms do not limit your own photos | Gold £10.99 a month (App Store UK) |
| CapCut | free on marketing pages, not in the terms | blog: no watermarks, original resolution kept | terms do not limit your own photos | Standard £10.99 a month (App Store UK) |
| Pixlr | no account; 3 saves a day | full size, but the mask is made on a 640 × 640 px copy | yes: “personal and commercial purposes” | Plus £2.99 a month (App Store UK) |
| Fotor | tool page: free with no sign-up | 2000 × 2000 px PNG, no watermark (our check) | no: help rules out commercial use on a free account | Pro £7.99 a month (App Store UK) |
| Clipdrop | 20 removals per 24 hours; asked us to log in after upload | uploads up to 5000 × 5000 px; watermark not stated | unclear: terms address consumers, FAQ does not limit it | Pro price not shown |
| iLoveIMG | 3 files at a time; AI tools need an account (terms) | up to 6 MB and about 17.6 MP per file | yes, you keep all rights | Premium €5 a month billed yearly (website) |
| PhotoAiD | no account, 1 file at a time | up to 30 MB and 10,000 px per side | your content stays yours; results not mentioned | no paid version of this tool |
| Clipping Magic | preview and mask editing only | no free download | only on a paid plan | Light $2.74 a month for 15 photos (website) |
Checked on 24-27 October 2026; tools tried on 26-27 October. App Store UK and adobe.com/uk prices include VAT; other prices are in the currency shown. The App Store shows Photoroom PRO from £4.99 without a billing period (website: $12.99 a month or $89.99 a year). Adobe’s tool page calls background removal free; its UK pricing FAQ calls it premium.
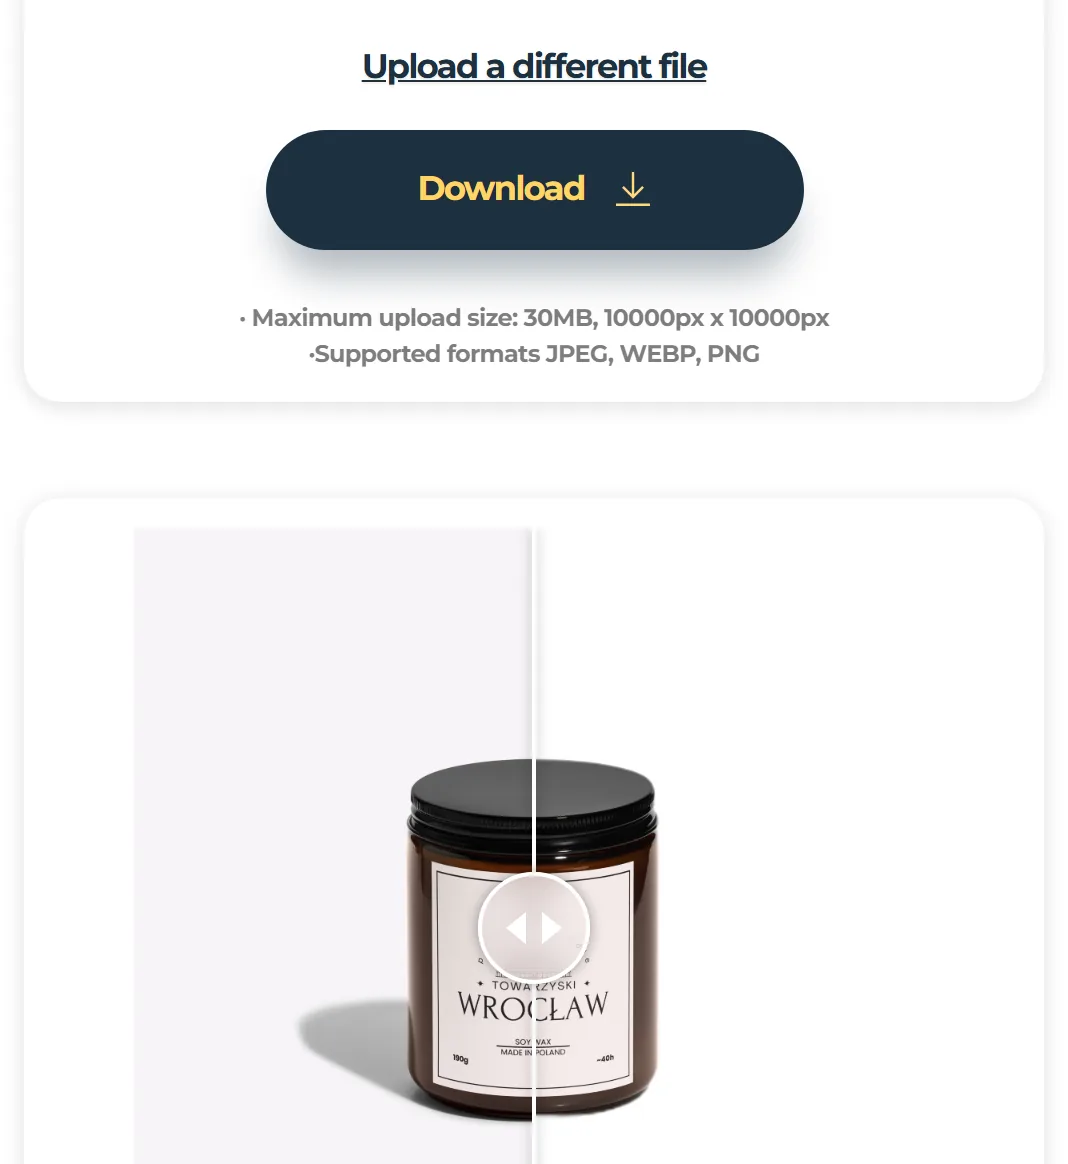
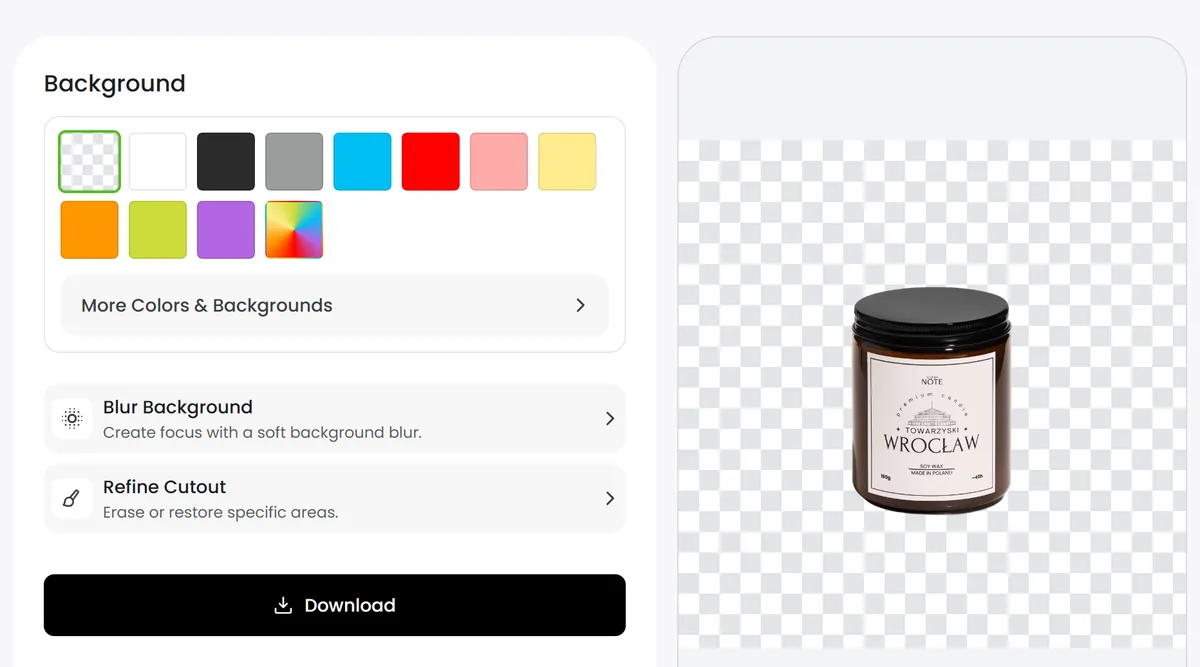
Fotor’s pricing page lists watermark-free and HD downloads only from Pro, yet our free PNG had no watermark. Our screenshots of the English sites, with a candle we shot for Urbannote, show limits and messages, not cut-out quality.
Free plans and photos for selling: two say no, one is unclear
Photoroom’s free plan “is for personal, non-commercial use only”, and Fotor’s help says a free account does not cover commercial use (its tool page promises free use “with no sign up needed”, while the help says free use starts “after you create an account”). Clipdrop is unclear: its visitor terms say the service is “intended for consumers” acting outside their profession, yet its FAQ (read 27 October 2026) says its terms “do not limit your ability to use images generated on ClipDrop for commercial use”.
A clear free yes comes only from Pixlr (“personal and commercial purposes”) and iLoveIMG (all rights to files and results stay yours). The rest need a paid plan or leave it open. Canva’s terms leave you the rights, but its free plan limits high-resolution downloads.
Output resolution: which tools shrink your photo
A camera photo often has 24-45 MP, and some sites quietly return less. According to their pricing pages, help and code:
- shrink the result: Photoroom Free (browser export up to 2000 px), Canva (up to 10 MP);
- compute the mask from a smaller copy: Pixlr (640 × 640 px, stretched back to the original);
- refuse a large file: iLoveIMG (6 MB, about 17.6 MP), Canva (under 9 MB);
- accept a large file (output size not always stated): Clipping Magic (80 MB, 25 MP), Fotor (60 MB, 8192 × 8192 px), PhotoAiD (30 MB, 10,000 × 10,000 px), Clipdrop (5000 × 5000 px).
For a shop, 2000-2560 px on the longer side is usually enough: Etsy recommends at least 2000 px, and Shopify says a 2048 × 2048 px square usually displays best.
Removing background online: where your photo goes and for how long
Every website in the table uploads your file to its server. For an unreleased product, check what happens to it:
- hours or days: iLoveIMG (up to 2 hours), PhotoAiD (up to 14 days without a purchase; built for ID photos), Clipping Magic (uploads expire after 2 weeks, then may be deleted or kept);
- long: Clipdrop without an account (2 years), Fotor (AI inputs for the life of the account);
- train on your photos: Photoroom by default (Data Control in account settings switches it off), Clipping Magic with no opt-out, CapCut per its policy, Canva depending on your privacy settings. Adobe (generative models) and iLoveIMG say they do not;
- licence for the service: Picsart gets a broad, irrevocable licence to uploads, Pixlr a perpetual licence to the photo and the result.
Windows 11 Photos works on the device, as does Photoshop set to Device. Photopea says in general that it does not upload files, and in our check on 26 October 2026 the browser sent the photo nowhere in the 30 seconds after Remove BG. Apple, Samsung, Google and Microsoft (for Paint) do not say whether the cut-out is made on the device.
Removing a background in Canva, step by step
Canva owns remove.bg, which announced that its website and apps would close on 1 December 2026, with background removal moving to Canva (remove.bg FAQ, read 27 October 2026). Canva’s free plan limits high-resolution downloads, without saying how many; bulk removal and transparent PNG need a paid plan. Steps from Canva’s help:
- Upload a photo under 9 MB, select it and choose BG Remover on the editor toolbar.
- Fix the result with the Erase and Restore brushes.
- For a white background, keep the page white (a new design starts white) and download JPG or PNG with Transparent background switched off; if it is on, the white page turns transparent too.
- For a transparent PNG, go to Share > Download and switch Transparent background on (paid plans).
Canva does not say whether the downloaded white is exactly 255, so check it in the White Background Checker.

A remove.bg alternative for each job
There is no single remove.bg alternative; pick one for the job:
- one free photo for a shop: Pixlr (3 saves a day; 640 px mask, so check the edge) or iLoveIMG, both fine for selling;
- a cut-out inside a design: Canva;
- a listing photo on white: the background tool in eBay, Shopify or Google Product Studio (overview), or a paid Photoroom plan;
- without uploading the photo anywhere: Windows 11 Photos, Photoshop set to Device, or Photopea;
- inside Photoshop: its own Remove Background quick action, no plugin needed;
- by API: Leonardo.Ai (part of Canva), Photoroom or BRIA (prices below).
Best background remover app? What the phone apps cost
We did not test phone apps for quality, so we will not name the best background remover app; for a social post, the free built-in options are often enough. App Store UK in-app prices (incl. VAT, 27 October 2026):
- Photoroom: free for personal use only; PRO at £4.99, £9.99 and £69.99 (see our Photoroom review).
- Pixlr: Plus Monthly £2.99; commercial use allowed.
- Adobe Express Monthly £8.99, Picsart Gold Monthly £10.99, Canva Pro Monthly £12.99.
Prices on Android may differ; we did not check Google Play.
How to change the background: a colour, another photo or AI
- A solid colour: Replace in Windows 11 Photos (palette or RGB values), Photoroom, Canva, Picsart, Fotor or Clipping Magic; Pixlr offers white or black.
- Another photo: after Remove Background, Photoshop 26.0 and later offers Color fill, Import background or Generate background on the Contextual Task Bar. In Paint you add the new background by hand on a separate layer.
- A generative AI background: convenient, but it can redraw the product, and marketplaces have their own rules for AI images (AI backgrounds). More in our guide to the best AI photo editors.
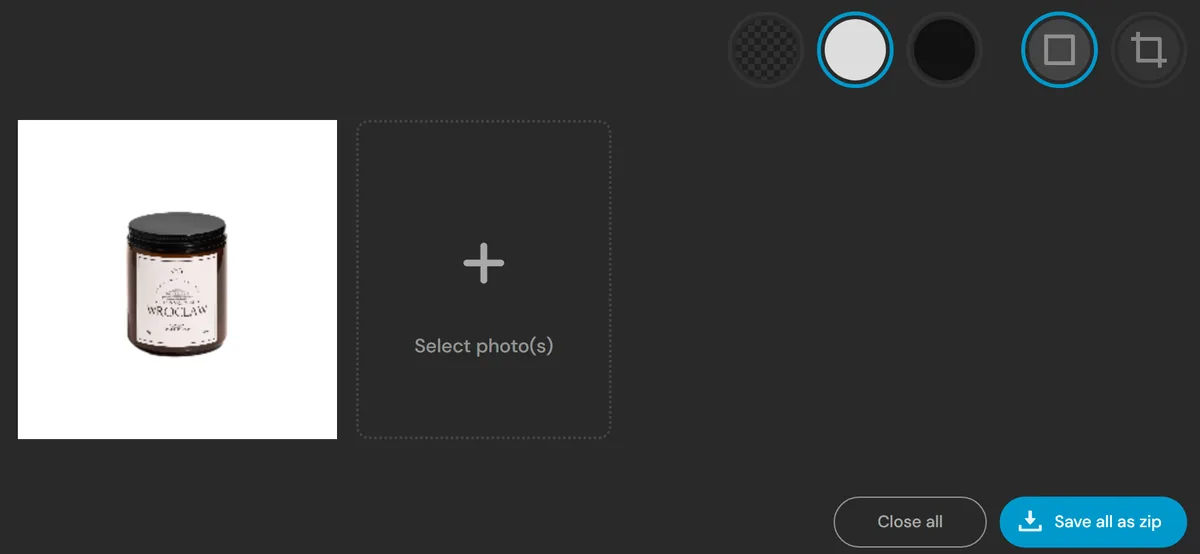
For a marketplace main image, white 255 is the safest choice; keep brand colours for your own shop.
Photoshop, GIMP, logos and batches: when one click is not enough
For fixing the mask, a logo or a whole series, desktop programs and APIs beat the websites above.
Photoshop, GIMP and Photopea: when you want to fix the mask
Photoshop: the Remove Background quick action (since November 2019) sits in the Properties panel and on the Contextual Task Bar. It makes a layer mask you refine with a brush or in Select > Select and Mask, where Decontaminate Colors removes the old background’s colour from the edge. In Edit > Preferences > Image Processing (on a Mac: Settings > Image Processing) you choose whether it runs on your computer (Device, the default) or in Adobe’s cloud (Cloud).
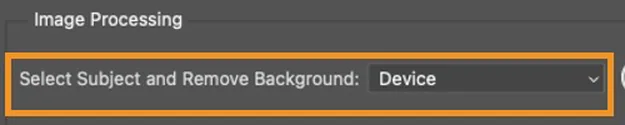
Generate Background and Generative Fill are generative AI and use generative credits. No Photoshop yet? See Adobe’s free Photoshop trial. GIMP 3.2 has no automatic AI removal, so use Foreground Select:
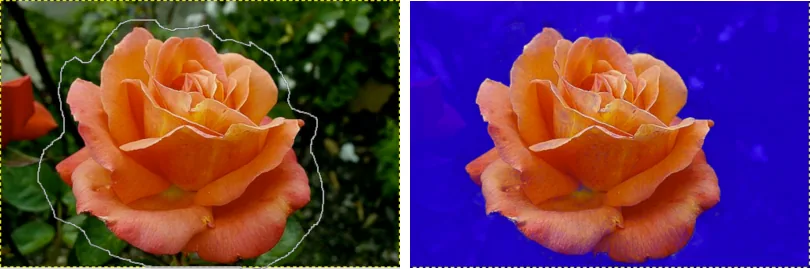
- Add an alpha channel: Layer > Transparency > Add Alpha Channel.
- Roughly outline the product and press Enter.
- Paint over the inside of the product, then click Select.
- Invert the selection and delete the background.
- Export a PNG. The documentation warns that Foreground Select can crash on large images.
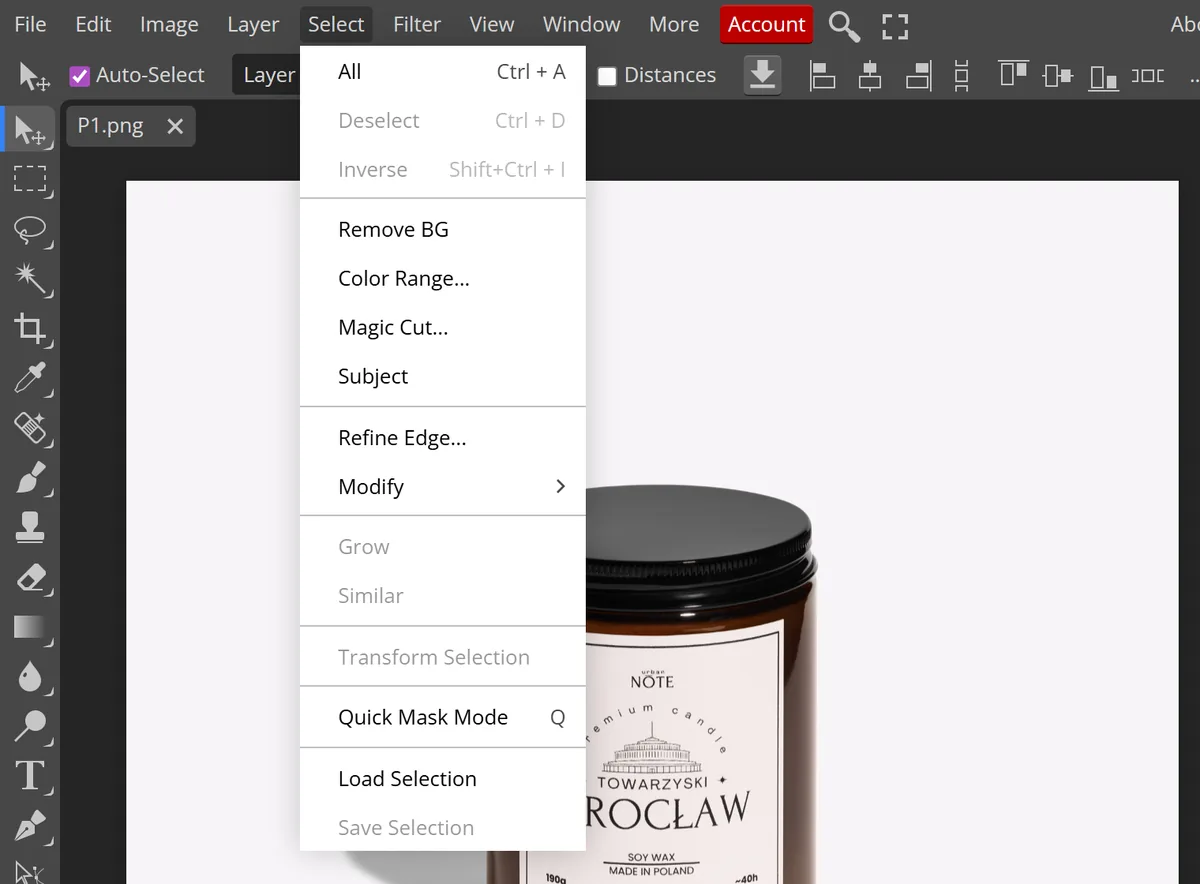
Photopea (in the browser): File > Open, Select > Remove BG, then File > Export As > PNG. The result is a layer mask you can fix with a brush; for hair and fur, the Select > Magic Cut tutorial suggests a Border of 20 or more. According to Photopea and our check, the photo does not leave the browser.
For a desktop editor without a subscription, see Affinity Photo as a free Photoshop alternative.
Logo, signature and graphics: a transparent background without AI
To remove a white background from a logo or signature, you do not need AI: a command that makes one colour transparent is enough.
- Ask for a vector file first (SVG, PDF, AI or EPS): it usually has a transparent background already and exports to PNG at any size.
- Word: select the picture, choose Picture Format > Color > Set Transparent Color and click the white. Microsoft notes it works for one colour and best on simple, solid-colour pictures. Save with Save as Picture.
- GIMP: Colours > Colour to Alpha with white. It tries to keep anti-aliased edges, but white letters inside the logo turn transparent too; in that case select only the background first.
Photograph a signature on white paper in even light and raise the contrast. A logo saved as JPG has light pixels along its edges (in our measurement, JPEG changed the background up to 17 px from the product); a one-colour command leaves them as a halo that shows on a dark background.
Removing backgrounds in bulk: cost per photo and APIs
Without coding, you can cut out a series on paid Canva plans (up to 50 photos at a time), in Picsart (up to 50 on Pro, 100 on Ultra) or with Photoroom Batch (up to 250). API prices (pricing pages and documentation, 26 October 2026):
| API | 100 photos a month | 1,000 photos a month | Watch out for |
|---|---|---|---|
| Leonardo.Ai (Canva) | $10.47 | $104.70 ($0.1047 per photo) | results stay in your library unless the call is set to ephemeral; PNG up to 10 MP |
| Photoroom (Basic) | $20 (smallest plan: 1,000 photos, unused ones lapse) | $20 ($0.02 per photo) | margin and fixed framing only in the Plus API ($0.10) |
| BRIA (RMBG 2.0) | $1.80 (100 free calls once, at the start) | $18 ($0.018 per photo) | transparency only; you add the white and the margin yourself |
Whatever the tool, a series only looks consistent with a fixed workflow:
- Sample: 10-20 photos, including the hardest (glass, white, thin parts), through two or three tools; view them on a contrasting background.
- One set of settings: white 255, the same framing and margin. In 209 packshots from our library, the product fills a median 80% of the frame width, with about 10% margin at the sides and 16% at top and bottom.
- Check: every hard product, a sample of the rest, and the white in the checker. If one glass bottle came out wrong, all of them usually will.
Remove a background in ChatGPT: the AI repaints the product
ChatGPT will remove the background from a photo if you ask, but not the way Paint or Photoroom does. A background remover works like scissors: it cuts out the real pixels of your product and leaves them unchanged. A generative model (ChatGPT Images 2.5, in ChatGPT since 8 September 2026) works like a painter: it paints the whole picture again from your photo. The result looks clean, but the label, lettering, texture or proportions may differ from the product your customer receives.
OpenAI’s own image prompting guide says as much: a region that must stay pixel-identical should be composited from the original, not left to the prompt. The same applies to Gemini (Nano Banana), prompt editing in Copilot and Generative Fill in Photoshop. More on Gemini in our guide to the Gemini AI photo editor.

| What you check | Cutting out (scissors) | Generative model (painter) |
|---|---|---|
| Product | the same pixels as in your photo | painted again, may differ |
| Label, lettering, logo | unchanged | OpenAI and Google both say their models struggle with exact text |
| Transparent background | PNG with an alpha channel | possible in ChatGPT on request, but sometimes you get a painted checkerboard (details below) |
How to remove a background in ChatGPT: 4 steps
- Add the photo at full resolution to a ChatGPT message, on the website or in the app: + > Add photos & files.
- Type the prompt (ready-made below) and name exactly what the model must not touch.
- Compare the result with the original, zoomed in: label lettering, logo, lid, texture. If anything has changed, use a background remover instead of another prompt: OpenAI warns that repeated edits can change details you meant to keep.
- Download the file and check it like any cut-out: the white in the White Background Checker, the transparency on a coloured background.
Both prompts follow OpenAI’s own cut-out example (“Preserve product geometry and label legibility exactly”), but that is advice, not a guarantee: the painter still paints. Highlighting only the background with Select in ChatGPT’s image editor is no guarantee either: “Highlights are not always precise, and edits may extend beyond the area you selected.”
In Gemini (gemini.google.com), click Add files > Upload files, pick the photo and paste the same prompt. Google’s help says image editing is not available to users under 18.
What you get: an AI image, not a cut-out product
- Resolution: OpenAI does not publish ChatGPT’s output size; SandBase’s test (9 September 2026) got 1254 × 1254 px (recommended API sizes for GPT Image models: 1024-1536 px per side, custom up to 3840 px in GPT Image 2.5). Gemini downloads at 1K, or 2K with a Google AI plan. A 6000 px camera photo comes back several times smaller.
- Transparency: GPT Image 2.5 has a transparent background setting in the API, and OpenAI’s help (updated 27 October 2026) says ChatGPT Images can “make the background transparent”. Google says nothing similar about Gemini. Both may paint a checkerboard instead (“A drawn checkerboard is not transparency”, says OpenAI): paste the file onto a bright colour and see whether the grid stays.
- AI traces in the file: ChatGPT Images 2.5 and Gemini both add C2PA metadata and an invisible SynthID watermark.
- Your photo: ChatGPT conversations can be used to train OpenAI’s models until you turn off Improve the model for everyone (Settings > Data controls); in Gemini, the Keep activity setting decides.
Pro tip: want the product in an AI scene? Swap the roles: let the painter paint only the background, then paste in the real product from a cut-out. The Amazon Ads image generator works this way, in the UK too: the product image stays unchanged and AI adds only the surroundings.
When to use ChatGPT and when to cut out the product
| What for | ChatGPT, Gemini | Cut-out |
|---|---|---|
| Social post or ad with the product in a scene | yes, after checking the label and logo | yes, with the scene added under the cut-out |
| Main image on Amazon, eBay or your own shop | no: buyers should get what they see | yes, then white 255 and a threshold check |
| Small print: ingredients, cosmetics, supplements, logos | no | yes |
| Dozens of photos in one style | no: OpenAI says brand elements do not always stay consistent | yes, with a batch tool |
| Draft of a shot or set-up | yes | not needed |
Whether to label the image depends on the result, not the tool. The UK does not currently regulate how AI-generated content is labelled (government report, 18 March 2026), and the ASA says there is no blanket legal requirement to disclose AI in ads. What counts is whether the picture misleads. CAP Code rules 3.1 and 3.11 ban misleading ads and exaggerated product capability, and in September 2025 the ASA wrote that images “should not be altered in a way which exaggerates what the product can do”.
Listings also fall under consumer law: the DMCC Act 2024 (s.226) treats an “overall presentation” likely to deceive as a misleading action, even if every fact in it is true. A disclosure will not rescue a repainted product: the ASA says it is “very unlikely to mitigate the harm caused by a fundamentally misleading message”. Platforms add their own rules:
- Etsy: apart from the one required unedited photo, AI may change backgrounds as long as the item does not look different. Etsy recommends noting AI edits in the listing description.
- Google Merchant Center: generative AI images must carry metadata such as IPTC trainedAlgorithmicMedia (compositeSynthetic for a composite with synthetic elements). Do not strip it.
- Selling into the EU: Article 50 of the AI Act also applies, since 2 August 2026. The European Commission’s guidelines of 20 July 2026 treat deleting a background that is visible in the original file as standard editing. But an AI image that makes a product in an ad or on packaging look different from, or better than, the real one counts as a deepfake.
AI backgrounds in Photoroom, CapCut and Photoshop
The same apps also sell AI-generated backgrounds and shadows: AI Backgrounds and AI Shadows in Photoroom, Generative Fill in Photoshop. CapCut even describes its background remover as “powered by Seedream 5.0 and Nano Banana Pro”, generative models that can redraw the product. After any such feature, check the result as you would a ChatGPT image: label, logo and product edge, zoomed in.
Test: 5 background removal methods, 13 product photos
We removed the background from 13 photos we took for Urbannote, a candle and reed diffuser brand: 7 packshots on a light background and 6 lifestyle photos. We tested four open AI models from the free rembg 2.0.85 package and one classic method without AI (GrabCut from OpenCV). The reference was our studio retouching: colour mask and edge matting, checked under magnification.

On a simple packshot all four AI models got the silhouette right: agreement with the studio cut-out averaged 0.980-0.994. The classic method scored 0.867 because it kept background next to the product, mostly the shadow: on average 15% of the product’s area. The models differ at the edge and in the hard spots.
How to read the table: agreement (IoU) is the overlap of the cut-out and the reference divided by their union; 1 means an identical shape. Edge error is the average transparency difference (0-255 scale) in a 6 px band around the product; lower is better. White 255 was measured on the 5 packshots after pasting onto white. Time is the median for a 2000 px photo on an ordinary processor without a graphics card.
| Method (year) | Agreement with reference (IoU) | Edge error | White 255 in the 40 px band | Time per photo |
|---|---|---|---|---|
| BiRefNet (2024) | 0.994 | 18.9 | 96.1-99.8% | 19.6 s |
| BiRefNet lite (2024) | 0.991 | 26.2 | 92.4-99.8% | 5.9 s |
| IS-Net (2022) | 0.980 | 33.1 | 91.4-99.8% | 1.0 s |
| U2-Net (2020) | 0.984 | 55.9 | 85.8-93.1% | 0.3 s |
| GrabCut (no AI) | 0.867 | 57.5 | 67.0-92.1% | 14.2 s |

We do not know which models the websites and apps in the table of 11 tools use, so these results are not a verdict on any of them. They show how good open models are today and where they go wrong.
Test method and its limits
- Photos: 13 files from the Urbannote press kit, 2000 px on the longer side, not recompressed. We have a reference for 5 packshots (P1-P5): cut-outs from studio retouching in which the shadow under the product counts as background, as in a shop photo.
- Methods: rembg 2.0.85 with the u2net, isnet-general-use, birefnet-general and birefnet-general-lite models, all run locally with default settings and no mask refinement. GrabCut from OpenCV, with the starting rectangle taken from the difference against the background colour.
- What we did not test: the default rembg model since version 2.0.80 (BRIA RMBG-2.0), because its licence is CC BY-NC 4.0 and this test is published by a company. The websites and apps from the table could not be run automatically on the same files without accounts and manual handling.
- Limits: one brand (candles, reed diffusers, wraps), with no jewellery, metal, clear glass, hair or fur. The reference is a retouch too, so differences of a few pixels may come from it. We judged the lifestyle photos (L1-L6) by eye on a contrasting background.
- Licences: U2-Net is Apache 2.0 and BiRefNet MIT, but BiRefNet was trained partly on the DIS5K dataset, whose terms forbid commercial use. The sources do not say whether that covers the trained weights, so the BiRefNet figure is a test result, not advice on what to deploy.
To cite it: marszalstudio test, 24 October 2026, 13 Urbannote product photos, reference from studio retouching. We share the data as a table on request.
Hard cases: 7 places where automatic removal fails
Automatic tools get the silhouette right; problems start where a studio retoucher zooms in. Below are cases from our test and our packshot work, and how to avoid them at the shoot.
Compare the methods on our photos
Pick a photo and a method. On yellow you can see leftovers of the old background and holes in the product that white would hide. The four photos below are where the methods differ most.
Compare the methods on our photos
Cut-outs by five methods on four photos from our shoot, shown on a contrasting background because mistakes are invisible on white. For each photo you see the weakest result next to BiRefNet, with every method described below.
Drag the line to compare with the original.
On white, leftover background and halos disappear. On a contrasting background you spot them straight away.
Urbannote 180 ml reed diffuser, 5 black reeds on a light background.
Results for all methods
Reeds. Urbannote 180 ml reed diffuser, 5 black reeds on a light background.


| Method | Result |
|---|---|
| Original | Photo from the shoot, light background with a shadow on the left. |
| BiRefNet (2024) | All the reeds kept (100% of reed pixels), shadow removed. |
| BiRefNet lite (2024) | 99.9% of reed pixels kept. |
| U2-Net (2020) | Only 26.6% of reed pixels left; three of the five reeds almost vanished. |
| IS-Net (2022) | 100% of reed pixels kept. |
| GrabCut (no AI) | The reeds are there, but with background between them and the shadow. |
White on white. White Urbannote 180 ml ceramic reed diffuser on a light background.


| Method | Result |
|---|---|
| Original | White ceramic on a light background. |
| BiRefNet (2024) | The whole bottle (100% of the light ceramic). |
| BiRefNet lite (2024) | The whole bottle (100% of the light ceramic). |
| U2-Net (2020) | 97.4% of the ceramic, but with a grey shadow at the base and a soft edge. |
| IS-Net (2022) | Removed the white base of the bottle below the label; 16.5% of the light ceramic is gone. |
| GrabCut (no AI) | The ceramic is whole, but the shadow stays and added background makes up 20% of the product area. |
Edge. Urbannote 190 g candle, close-up of the black lid. Edge error: the average difference in transparency from the reference cut-out within 6 px of the edge, on a 0-255 scale; lower is better. White 255 around the product: the share of background pixels within 40 px of the product that are exactly 255 once placed on white.


| Method | Result |
|---|---|
| Original | Close-up of the black lid on a light background. |
| BiRefNet (2024) | Edge error 17.6 (the lowest); 98.0% white 255 around the product. |
| BiRefNet lite (2024) | Edge error 29.5; 96.8% white 255 around the product. |
| U2-Net (2020) | Light halo around the lid, edge error 62.7, only 88.6% white 255 around the product. |
| IS-Net (2022) | Edge error 38.0; 96.6% white 255 around the product. |
| GrabCut (no AI) | Ragged edge and shadow, error 54.1, 73.0% white 255 around the product. |
Lifestyle. Urbannote reed diffuser in front of a vase of dried flowers, on marble. Visual assessment, no reference cut-out.


| Method | Result |
|---|---|
| Original | Lifestyle shot with a vase, dried flowers and marble. |
| BiRefNet (2024) | Clean, only the bottle and reeds left. |
| BiRefNet lite (2024) | Clean. |
| U2-Net (2020) | The reflection under the bottle stayed, soft edge. |
| IS-Net (2022) | A piece of the marble stand and the reflection stayed. |
| GrabCut (no AI) | The vase and dried flowers stayed in the frame. |
Photos: marszalstudio for Urbannote, published with the brand’s permission. Methods run locally (rembg 2.0.85, OpenCV) with default settings; test on 24 October 2026.
Thin parts: reeds, chains, wires
The diffuser reeds (P6) were the toughest test, as the comparison above shows: U2-Net kept only 26.6% of their area. IS-Net and both BiRefNet variants kept 99.9-100%. GrabCut kept the reeds, but with the background between them.
In the studio we check cut-outs exactly there: blade tips, teeth, wires, jump rings and the gaps in a chain, where a strip of old background or shadow most often survives. A gap goes white only where the original shows background through it; a dark inside stays dark.
With jewellery, the background must be 255 between the prongs of a setting and inside a ring too, with no grey haze. We cover the shoot in how to photograph jewellery.
White on white: a white product on a white background
A reed diffuser in pale ceramic (P4) was the second hard case. IS-Net cut away 16.5% of the pale ceramic with the background: the white base of the bottle under the label. U2-Net kept 97.4% of the bottle’s pale pixels, both BiRefNet models 100%.
Do not use Colour to Alpha on a white product: the GIMP documentation says it makes every pixel of the selected colour transparent, not just the background, so a white product turns semi-transparent too. On a simple logo it works fine (see above).
Lifestyle photos: the model decides what the product is
On the six lifestyle photos with props, GrabCut failed every time: it kept the wall, the shelf or the vase. BiRefNet was clean on all six. U2-Net left the reflection under the reed diffuser. IS-Net left it too, plus a piece of the marble coaster, and on another photo made a semi-transparent hole in the bottom edge of the label.
The most telling mistake came from BiRefNet lite: on two photos it attached the lid lying next to the candle to the candle itself. The model does not know what you sell; it only guesses what the main object is. With props in the shot, always check what was kept and what was removed.
Shadow: keep it or remove it
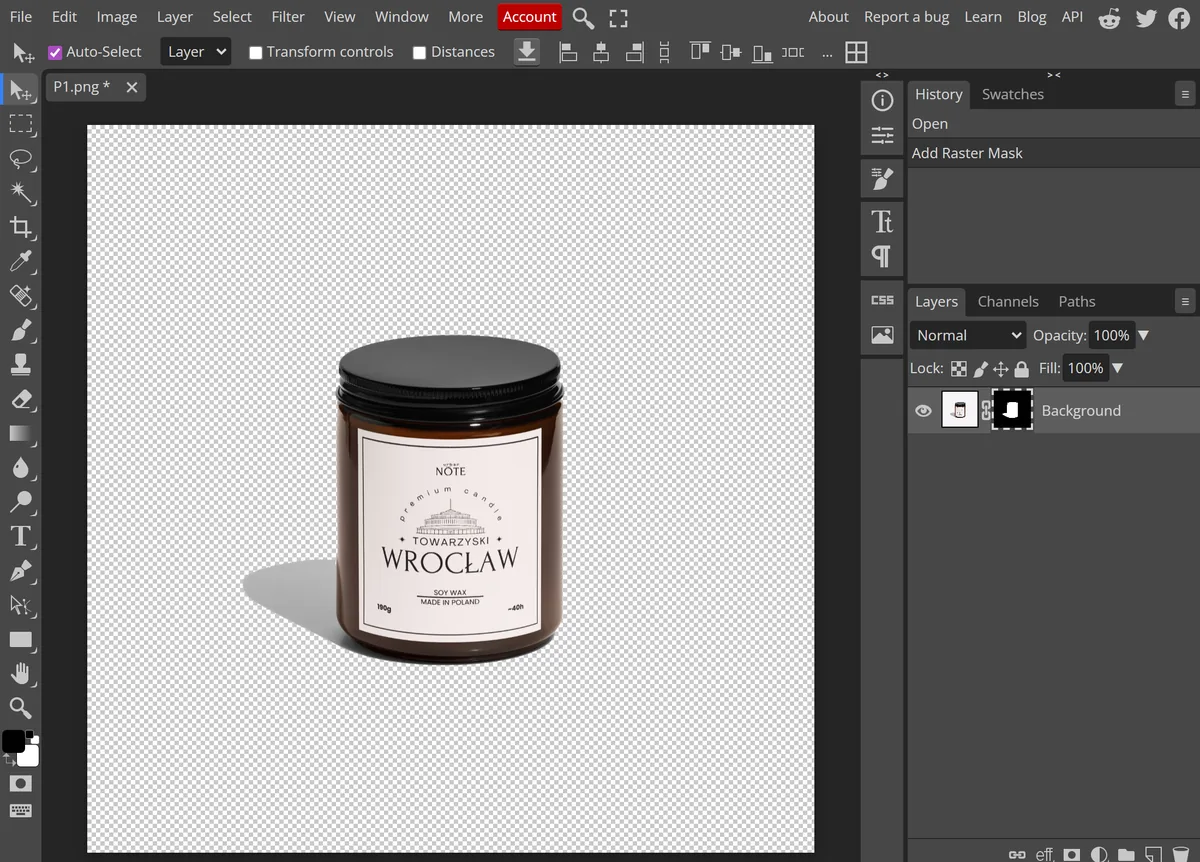
Automatic tools usually remove the shadow with the background, and a product without one can look as if it is floating. Of the apps we tried, only Photopea’s Remove BG kept the candle’s shadow, as part of the product (screenshot below). The Amazon UK seller pages we could read say nothing about shadows, and in your own shop a contact shadow often looks more natural.
The simplest approach is two versions from one shoot: no shadow for marketplaces, a shadow for your own shop. Our white-background packshots come without a shadow unless you ask for one: at least half of the 209 in our library have none. Online tools such as Photoroom’s AI Shadows can add a shadow after the cut-out, but it is drawn by AI, not cast by real light.
Glass and clear packaging
The old background shows through glass, so after the cut-out the inside of a bottle stays grey. An automatic tool either leaves the semi-transparent edges dirty or cuts them away with the background. Amazon UK makes no exception for glass: the main image needs pure white like any other. Our test had no clear, empty glass (only candles in amber and dark glass jars), so we give no numbers.
In retouching, we keep the glass at the bottom of a jar light and see-through, not almost black, and remove specks from it on every photo. Most of the work happens at the shoot, though: black cards at the sides and a backlit background, as in our guide to photographing glassware.
Halo and the old background’s colour on the edge
A light or grey band of 1-3 px around the product (a halo) shows most when the cut-out goes onto a different background from the original. Photoshop’s help offers Layer > Matting > Defringe and Color Decontaminate, which replace the old background’s colour in edge pixels with the product’s colour. A coloured background also reflects in the product itself, and no background tool touches that.
In the studio, the edge should be soft across 1-2 px, with no light outline and no jagged steps from the mask. We recalculate each edge pixel as if the product had stood on white from the start, and restore the colour that background reflections took from the product.
Hair, fur, fluff
Hair and fur were not in our test. Manual tools have dedicated modes: GIMP’s Foreground Select offers the Matting Levin and Matting Global engines, though the documentation warns that the faster settings are less accurate (and Matting Levin is temporarily unavailable on Windows). On clothing, we remove every stray fibre and bit of fluff from the outline, and the edge must be sharp, with no light halo.
Shoot for an easy cut-out
If you plan to remove the background from a photo later, the cleanest cut-out starts at the shoot. In our studio work, four things help any tool:
- Contrast with the product: choose a background that differs from the product’s edge in colour and brightness: a white product on grey or a darker tone, never white on white; a dark product on a light one.
- Distance from the background: stand the product well away from the wall or backdrop, so its shadow falls on the surface under it rather than behind it, and you can light the background separately.
- Soft light: large, diffused light gives soft shadows. In our test, shadow made up most of the background the classic method wrongly kept with the product.
- Resolution: shoot larger than you need and downscale only after the cut-out (see the order of steps below).
For backdrop options, from paper rolls to a cyclorama, see our photo background guide.
Pure white 255: is the background really white?
Amazon UK states the value outright: the main image “must have a pure white background, defined as RGB values of 255, 255, 255”. Most other platforms just say “white background” or name no colour. Guides to making a photo background white usually stop at pasting the product onto white, and that is where the trouble starts: light grey pixels stay next to the product, invisible to the eye but not to an eyedropper.
Getting pure white at the shoot is covered in our guide to white background product photography. Here we check what is left after the cut-out.

White Background Checker: check the white in your photo
Click an example from our test or choose your own file: yellow marks every background pixel that is not 255. To check white, framing and file size against 10 platforms at once, use our Packshot Checker.
White Background Checker
Upload a photo after background removal. We count how much of the background is exactly RGB 255, 255, 255 and whether a grey outline is left around the product, which you cannot see on a white page.
Your photo never leaves your device: everything is calculated in your browser and nothing is uploaded.
The tool runs in your browser and needs JavaScript. Below are the method and the results for the three examples.
or drag it here. JPG, PNG or WebP.
Example, Urbannote candle:
An example will appear in a moment.
white 255background other than 255darkest background
The tool cannot tell a white product from a white background (it counts the light edges of the product as background), and it counts a shadow darker than 235 as part of the product.
White-background packshots from our studio with AI retouching or premium retouching are delivered with a 255, 255, 255 background.
How we measure
- Background means light pixels (every channel at least 235) connected to the edge of the photo. Everything else is the product, including any shadow darker than 235.
- Band around the product: background from 3 px to 2% of the longer side away from the product (at least 12 px; 24 px for a 1200 px photo). This is where halos and shadows from cutting out are left, and you cannot see them on a white page. We skip the first 3 px: that is normal edge smoothing.
- Background 255: the share of the background beyond the band that is exactly RGB 255, 255, 255 (for a photo without a product: the whole background).
- Darkest background is searched for from 3 px away from the product, because closer in there is normal edge smoothing. Corners are the four corner pixels, which is what an eyedropper will show.
- Verdict: ‘Pure white 255’ when the background is at least 99.5% white 255 and the band at least 99%; ‘Almost: grey outline around the product’ when the background meets its threshold but the band does not; ‘The background is not white’ when less than 99.5% of the background is white 255.
- Transparent pixels (PNG, WebP) are counted as white 255, the way a white page shows them. Photos longer than 3000 px are measured on a copy reduced without smoothing: every pixel of the copy is a pixel of the original.
The same Urbannote candle photo, 1200 × 1200 px, lossless WebP. Measured with this tool on 24 October 2026.
| Example | Background 255 | Band 3-24 px around the product | Darkest background | Corners 255 | Verdict |
|---|---|---|---|---|---|
| From the shoot, unedited | 0% | 0% | RGB 237, 237, 238 | 0 of 4 | The background is not white |
| Cut out with U2-Net, on white 255 | 100% | 95.2% | RGB 246, 246, 246 | 4 of 4 | Almost: grey outline around the product |
| Cut out with BiRefNet, on white 255 | 100% | 99.5% | RGB 253, 253, 253 | 4 of 4 | Pure white 255 |
How to check white in software: eyedropper and threshold
- Eyedropper without averaging: in GIMP, the Colour Picker’s Sample average option averages the colour over a square, so a single 254 pixel hides. Turn it off and check the four corners and spots 1-2 cm from the product on every side.
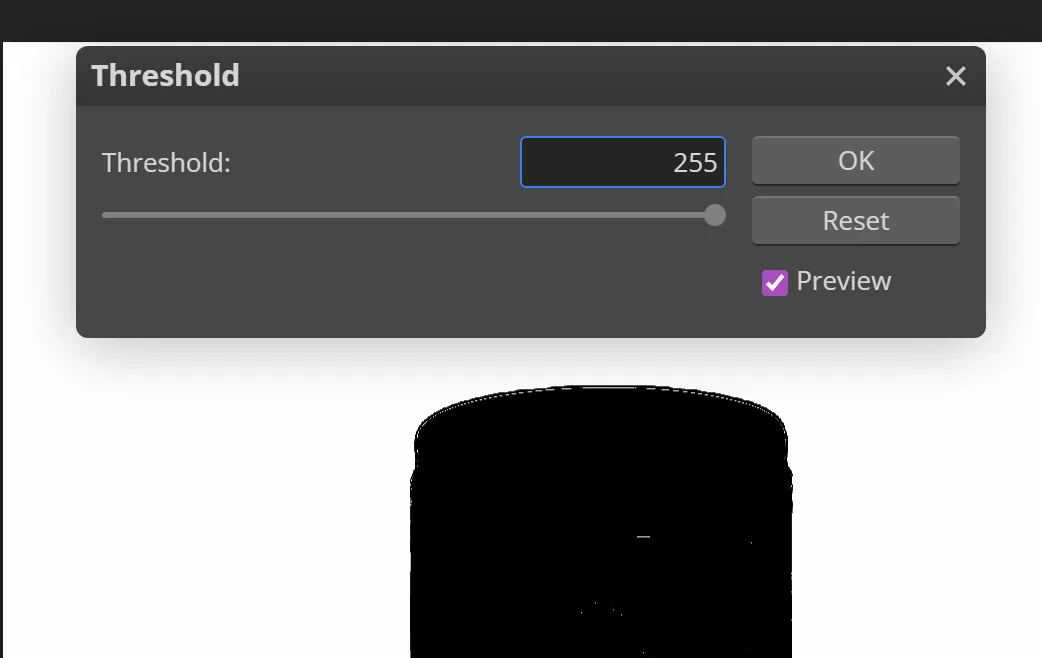
- Threshold at 255: on a copy of the layer, set the threshold so that only 255 stays white (GIMP: Colours > Threshold, range 255-255; Photopea: Image > Adjustments > Threshold, value 255). Every other pixel turns black, so only the product should come out black.
- Check the final file: test the file you upload, not the working one. Saving and downscaling can turn 255 into 254 (details below).
Compression and downscaling: when 255 turns into 254
We tested this on three Urbannote packshots with pure white 255. With the Pillow library, ordinary JPEG and lossy WebP compression changed only the pixels right next to the product: 0.04-0.58% of the background across all the settings we tried, all within 28 px of the edge. The corners and the band along the edge of the frame stayed 100% white.
| Saved as | Changed background pixels | Darkest background pixel | Furthest from the product |
|---|---|---|---|
| JPEG quality 85, 4:2:0 | 0.19-0.40% | 233-238 | 12-17 px |
| JPEG quality 95, 4:4:4 | 0.07-0.22% | 247-249 | 9 px |
| WebP quality 80 | 0.24-0.53% | 238-241 | 19-28 px |
| WebP quality 97 | 0.06-0.20% | 249 | 7-9 px |
| PNG, lossless WebP | 0% | 255 | not applicable |
Pro tip: the encoder matters. Our table uses Pillow. The same three packshots saved as WebP at quality 95 with the OpenCV library kept their corners at 255, yet 2.3-2.6% of the background more than 30 px from the product turned 253. An eyedropper in the corners would miss it; only a threshold across the whole background showed it.
Downscaling can do more damage. A Lanczos filter that truncates to a whole number instead of rounding turned 40% of the background into 254 at a non-integer scale (2048 to 1000 px), corners included. We do not know which popular programs calculate this way, so stick to this order:
- Cut out the product.
- Flatten the image onto white 255.
- Downscale to the target size.
- Save the file once, in the target format.
- Check the final file with a threshold, not the working one.
JPG, PNG or WebP after removing the background
| Format | Transparency | When to use it |
|---|---|---|
| JPG | none (transparent pixels have to be flattened onto a colour) | marketplaces and shops: a file flattened onto white 255, quality 90-95 |
| PNG | yes, full | graphics and banners; on a product page or marketplace, as a file flattened onto white (Amazon, eBay, Etsy, Shopify and Google all accept PNG) |
| WebP | yes, in lossy WebP too | websites: lossless WebP is 26% smaller than PNG (Google’s figure); eBay, Shopify and Google Merchant Center accept it, Amazon and Etsy do not |
Transparency does not survive everywhere. Etsy’s help says the transparent parts of an image “will appear black on Etsy”, and similar problems keep coming up on the Shopify Community forum:
- the shop theme puts a grey background under a transparent product photo;
- a file re-saved as JPEG loses its transparency and the empty areas turn black;
- in Google Shopping some transparent images from the product feed show up on a black background.
The safest approach is one source file with transparency and versions made from it: on white 255 for marketplaces, Google Shopping and product pages, transparent for banners. To test a PNG, put a coloured layer under it: a checkerboard baked into the pixels stays on top.
When you flatten, set the background colour yourself. GIMP’s Remove Alpha Channel fills transparency with the toolbox background colour, so unless that is exactly 255, 255, 255, the file will not have pure white. More on the formats in what JPG is and when to use it, and on WebP in our guide to the WebP format.
White background on Amazon, eBay, Etsy, Shopify and Google
Of the platforms below (checked on 27 October 2026), only Amazon requires a pure white RGB 255, 255, 255 background, and only for the main image. eBay and OnBuy recommend white; Etsy, Shopify and Google leave the colour to you.
| Platform | Main image background | Size | Also note |
|---|---|---|---|
| Amazon UK | required: “a pure white background, defined as RGB values of 255, 255, 255” | longest side 1000 px or more for zoom | product on at least 85% of the frame; no text, logos, borders or props |
| eBay UK | recommended: “White backgrounds are generally best” | 500 px or more; 1600 × 1600 px recommended | no added borders, text or watermarks |
| Etsy | not set | first photo 635 px or more; 2000 px recommended | one unedited photo required; transparent areas show as black |
| Shopify | your choice | a 2048 × 2048 px square “usually displays best” | your shop, your standard |
| Google Merchant Center | not set | at least 500 × 500 px for all products from 31 January 2027 | product on 75-90% of the image; no borders or watermarks |
| OnBuy | white “where possible” | at most 1000 × 1000 px | JPG, PNG or GIF |
| Not On The High Street | lifestyle preferred | not given | see below |
| Vinted UK | any | not given | “no image editing is allowed” |
Our packshot guide has the full main image rules for 12 platforms. One file passes on most of them:
- JPG or PNG without transparency;
- 255 white across the whole background, with no shadow;
- sRGB colour profile;
- a 2000-2560 px square with the product on about 85% of the frame.
For OnBuy’s 1000 × 1000 px limit, our free image resizer pads a non-square photo with white in your browser; check the padding in the White Background Checker. If a main image fails:
- Amazon checks the main image automatically, shows “Issue detected” and may offer a corrected version; a non-compliant image can get the listing suppressed from search. Its UK listing guide warns that even “RGB 252,252,250 (looks white to you) gets rejected”.
- A white border does not help: Amazon UK, eBay and Google all ban borders.
Removing the background in the platform dashboard: eBay, Shopify and Google
Before paying for a tool, check your seller dashboard (help pages read on 27 October 2026):
| Platform | Where | What you get | Watch out for |
|---|---|---|---|
| eBay | website and app, Background icon | “a solid white colour”; the app also offers AI-generated backgrounds | for the main image choose White, not a generated scene |
| Shopify | media editor, desktop and mobile | Color background: a solid colour or transparency | save a transparent image as PNG; free on all plans “for a limited time” |
| Google Merchant Center | Product Studio, Remove background | the product “on a white background”, free of charge | experimental; not available to merchants based in Russia or France |
| Amazon | none in the seller help | an automatic check, sometimes a corrected image | check the corrected image before accepting it |
None of them promises 255 white, so check the file before setting it as the main image. More in our eBay UK selling guide and our Google Product Studio review.
When not to remove the background: Etsy, Vinted, Not On The High Street and shiny products
White matters mainly for the main image, and sometimes a real background works better or is required:
- Etsy: its help (updated 22 October 2026) says a listing “must include at least one unedited photo of the actual item against a real background”, with exceptions such as print-on-demand and digital downloads. On other photos you may change the background, even with AI, if the item looks as the buyer will receive it (see how to sell on Etsy UK).
- Vinted UK: photos “have to represent the item as it is - no image editing is allowed”, so shoot on a plain, light background instead (Vinted photo tips).
- Not On The High Street: “lifestyle photography showing products in situ, as opposed to white backgrounds or mannequin shots perform best on our platform”.
- Jewellery and reflective items: eBay says “a darker background may work better”.
When to order photos on white instead of cutting them out
Removing the background yourself is enough for a few simple products, if you check the white before uploading. A studio shoot makes sense when:
- the product is glass, shiny, white or in clear packaging;
- it has thin parts: chains, reed sticks, wires, tassels;
- you need a series with the same framing, size and white;
- your phone photo has a grey, uneven background and colour casts that a cut-out will keep;
- you need versions with and without a shadow for different platforms.
How the options compare (prices as published on 27 October 2026):
| Option | Price per photo | You send | Result |
|---|---|---|---|
| Do it yourself | free with built-in tools; paid apps such as Canva Pro £12.99 a month (App Store UK, incl. VAT) | nothing | a cut-out of your own photo, with its grey cast and reflections |
| Cut-out service (Clipping Expert Asia) | from $0.30; masking of hair, fur and transparent objects from $0.99 (website) | your photos | a cut-out made by an editor; light and colour stay as shot |
| “On white” studio (productphoto.com, Texas) | $40 each for 1-10 photos, down to $30 from 51 (website) | the products | pure white background, styling and retouching |
| marszalstudio (Warsaw) | from €9 excl. VAT; pure white 255 +€3 | the products | JPG 2000 × 2000 px; options below |
Before delivery, our software checks every file retouched to pure white: no non-255 background pixel may lie more than 3 px from the product (a little more in a JPG, because JPEG works in 8 × 8 px blocks and always changes a few pixels at the edge).
| Service | Price per photo (excl. VAT) | What you get |
|---|---|---|
| Packshot on a white background | from €9 | JPG 2000 × 2000 px, white not levelled to 255 |
| AI retouching | +€3 (normally €5) | pure white 255; nothing is painted in, so shape, colour, text and logo stay true; not for clothing |
| Premium retouching | +€9 | removes creases, dust and discolouration, straightens edges; pure white |
| Remove background (PNG) | +€3 | an extra transparent PNG, without a shadow |
| Add shadow | +€3 | a shadow under the product |
Typical totals per photo (excl. VAT):
- main image with 255 white: €12 (packshot plus AI retouching);
- the same with a transparent PNG: €15;
- clothing on white: €18 with retouching (AI retouching does not cover clothing).
For jewellery, glass and shiny cosmetics, choose premium retouching: sparkle and highlights matter there. Our glossary explains post-production, and all session prices are on our product photography pricing page.
Every step from choosing a session to receiving the files is in how to order product photography.
Checklist: 16 points before you upload a photo to your shop
The list is for the main image; for styled photos, skip the Background points.
File
- For a marketplace: a JPG, or a PNG flattened onto 255 white, never a PNG with transparency.
- Saved once, at the end: JPG at quality 90-95 or PNG.
- sRGB and a format the platform accepts (OnBuy: JPG, PNG or GIF).
- Longer side 1000 px or more for Amazon zoom, ideally 2000-2560 px; a 1000 × 1000 px copy for OnBuy.
Background
- An eyedropper without averaging reads 255, 255, 255 in the corners and 1-2 cm from the product on every side.
- A threshold at 255 on a layer copy: the background is all white, only the product is black.
- In gaps (a mug handle, a chain, between reed sticks), white appears only where the original showed background.
- After resizing and saving, you check the final file, not the working copy.
Edge and product
- At 200% zoom on a dark background there is no light halo.
- The edge has the product’s colour, not the old background’s, and is soft over 1-2 px with no jagged steps.
- Tips, wires and tassels are whole; a white product keeps a visible edge and has not turned semi-transparent.
- Stands, clamps and fishing line are gone, reflections included, and no props remain.
- Shadow or no shadow, as the platform and your series require, the same on every photo.
Framing and AI
- The product fills about 85% of the frame and does not touch the edges.
- The background is not AI-generated, or you follow the platform’s AI rules (Google: IPTC metadata; Etsy: one unedited photo).
- After ChatGPT or Gemini, the label, lettering and logo match the original when zoomed right in.
FAQ: 13 questions about background removal
-
How do I remove the background from a photo for free?
Free and without an account: Paint or Photos in Windows 11, Preview on a Mac, or touch and hold the product in an iPhone photo. Free websites limit resolution or the number of photos; for selling, Pixlr and iLoveIMG allow free use.
-
Which app or program is best for removing backgrounds?
It depends on the job: Photos in Windows 11, Preview on a Mac or Photopea for single photos; paid Canva, Photoroom or Picsart plans for batches; Photoshop or GIMP for full edge control. Then check the white with a threshold at 255.
-
How do I remove the background from a photo on my phone?
On an iPhone with iOS 16 or later, open the photo, touch and hold the product, then tap Copy or Share (Add Sticker from iOS 17). Google Photos on Android makes stickers instead: press and hold the subject, then tap Copy or Share.
-
How do I make a photo background white (RGB 255)?
In the Windows 11 Photos app, open the Background panel, choose Replace and enter RGB 255, 255, 255. Elsewhere, put the cut-out on a 255 white layer, flatten it and check the whole background with a threshold.
-
How do I make a photo background white on an iPhone?
Use Apple’s free Keynote: make a square slide with a white background, insert the photo, tap Remove Background and export the slide as a JPEG or PNG. Apple does not say the white is exactly 255, so check the file before uploading.
-
How do I remove a white background from a logo?
Ask for the vector file first. On a simple logo, Set Transparent Color in Word or Colour to Alpha in GIMP will do, but both turn every white pixel transparent, white letters inside the logo included. Check the result on a dark background.
-
Which file format keeps a transparent background?
PNG and WebP, including lossy WebP. JPG has no transparency, so transparent areas must be flattened onto a colour. For marketplaces, upload JPG or PNG on 255 white: Etsy, for one, shows transparent parts as black.
-
Can I remove the background from many photos at once?
Yes, mostly on paid plans: Canva handles up to 50 images at a time, Picsart 50 on Pro and 100 on Ultra, and Photoroom Batch up to 250. Through the Photoroom API it costs $0.02 per image on the Basic plan.
-
Why does AI cut out glass, white products and thin parts badly?
Glass shows the old background through it and a white edge vanishes against white, so the model guesses where the product ends. In our test one model cut away 16.5% of a white ceramic diffuser and another lost most of the thin reed sticks.
-
Can ChatGPT remove the background and make a transparent PNG?
OpenAI’s help says ChatGPT Images can make a background transparent, but it redraws the image: compare the label with the original and check the transparency on a coloured background. For white, ask for the product unchanged on RGB 255, 255, 255.
-
What is a good remove.bg alternative?
Single photos: Windows Photos or Mac Preview; free online for selling: Pixlr or iLoveIMG; designs: Canva; automation: the Photoroom API. Canva, which owns remove.bg, announced that the remove.bg website and apps would close on 1 December 2026, with background removal continuing in Canva.
-
Is it safe to upload product photos to online background removers?
It depends on the service. iLoveIMG says it does not train on your files and deletes them within two hours; Photoroom uses uploads for training unless you opt out in account settings. For unreleased products, use Windows Photos, which processes photos on your device.
-
When is it better to order photos on a white background than to cut out your own?
When the product is glass, shiny, white or has thin parts, and when you need a consistent series. At marszalstudio a packshot costs from €9 per photo, or €12 with AI retouching and pure white 255 (both excl. VAT).
Summary: 5 rules for a shop-ready cut-out
- For a post or a presentation, a phone, Paint or Preview on a Mac is enough. ChatGPT and Gemini redraw the product, so use a real cut-out for the main image.
- For a shop, cut out with any method, flatten onto 255 white, resize, save once and check the whole file with a threshold, not just the corners.
- For exact 255 white with no extra software, use the Windows 11 Photos app: Replace, then RGB 255, 255, 255.
- Check the licence first: Pixlr and iLoveIMG allow selling for free; Photoroom’s and Fotor’s free plans do not, and Clipdrop is unclear.
- Inspect glass, white on white and thin parts at high zoom on a contrasting background; for a series of them, consider a studio shoot with retouching.
Sources
Built-in tools in phones and computers (read 24-27 October 2026)
- Apple: lift a subject on iPhone, iOS 16 updates, Preview on iPad, Preview on Mac, Quick Actions in Finder, Photos on Mac; Keynote for iPhone: remove a background, slide background, slide size, export
- Microsoft: background removal in Paint, layers and transparency in Paint, Copilot menu in Paint, AI actions in File Explorer (KB5065789), October 2025 security update (KB5066835), deprecated features (Paint 3D), edit photos in Windows, background remove and replace in Photos, remove the background of a picture in Office, make a picture transparent in Word
- Samsung: Samsung US help (Image Clipper), Samsung US help (stickers), Samsung US Newsroom (One UI 6), SamMobile; Google: stickers in Google Photos, edit photos, June 2026 Pixel Drop (Ask Photos in the UK)
Photo editors: Photoshop, GIMP and Photopea (read 24-27 October 2026)
- Adobe Photoshop: Remove Background in Photoshop (2019), Photoshop update of October 2022, Photoshop 26.0: background options after removal, generative credits, Device and Cloud processing, Photoshop help: processing on device and in the cloud, Select and Mask tutorial, Adjusting pixel selections (fringe pixels) (archived copy of 18 October 2025, as Adobe’s site blocks automated reading)
- GIMP: GIMP 3.2 release notes, Foreground Select in GIMP 3.2, Colour to Alpha, Threshold, Colour Picker, Remove Alpha Channel, documentation licence
- Photopea: Remove BG, Learn
Background remover websites and apps (read 24-27 October 2026)
- remove.bg, FAQ on the move to Canva (read 27 October 2026; not linked, as the page was due to close)
- Canva: Background Remover, bulk background remover, help: Background Remover, help: transparent background, terms of use, AI product terms, privacy, App Store UK
- Photoroom: plans, export limit, resolution limits, free accounts and commercial use, pricing, privacy, App Store UK
- Adobe: background remover, UK pricing, general terms, App Store UK; Picsart: tool, pricing, terms, App Store UK
- CapCut: tool, blog, terms, privacy, App Store UK; Pixlr: tool, pricing, licence agreement, App Store UK
- Fotor: tool, pricing, commercial use, free use, privacy, App Store UK; Clipdrop: tool, pricing, visitor terms, FAQ on the home page, privacy
- iLoveIMG: tool, pricing, terms; PhotoAiD: tool, terms, privacy; Clipping Magic: pricing, terms, privacy
- APIs and bulk removal: Leonardo.Ai: background removal API; Photoroom: API pricing, Batch; BRIA: pricing
How we read the prices: GBP prices come from the in-app purchase lists in the App Store UK and include VAT; the App Store does not always show the billing period. From our location, the websites of Photoroom, Pixlr, iLoveIMG and Clipping Magic showed US dollars or euros, so we give those as shown. Adobe Express is the only tool whose UK website price (incl. VAT) we could read. The Clipdrop Pro price does not appear on its pricing page.
ChatGPT, Gemini and AI image tools (read 27 October 2026)
- OpenAI: Images in ChatGPT, uploading files, data controls in ChatGPT, ChatGPT Images 2.5 system card, image generation and editing in the API, image prompting guide, image edit parameters, content provenance (C2PA, SynthID); SandBase test of ChatGPT Images 2.5
- Google: images in Gemini Apps, uploading files to Gemini, watermarks and Content Credentials, Gemini Apps privacy and Keep activity, Nano Banana Pro (Google DeepMind)
- Microsoft: image generation in Copilot; Adobe: Generative Fill (read 26 October 2026); Amazon Ads: image generator, guide with country list
UK and EU rules (read 27 October 2026)
- UK: Report on Copyright and Artificial Intelligence (18 March 2026), ASA: disclosure of AI in advertising (29 May 2025), CAP Code, section 3: misleading advertising, ASA: avoiding misleading imagery in ads (11 September 2025), Digital Markets, Competition and Consumers Act 2024, section 226
- EU (read 26 October 2026): AI Act, Article 50, European Commission guidelines on transparency obligations
Models and image formats (read 27 October 2026)
- rembg (version 2.0.85), U2-Net (Qin et al., Pattern Recognition 2020), IS-Net / DIS (ECCV 2022), BiRefNet (2024), BRIA RMBG-2.0, GrabCut in OpenCV
- Google: WebP; MDN: Image file type and format guide
marszalstudio test: 13 Urbannote product photos (7 packshots, 6 lifestyle photos), reference cut-outs from studio retouching (colour mask and edge matting) for 5 packshots, rembg 2.0.85 and OpenCV, 24 October 2026; compression and downscaling measured on 3 packshots with pure white 255 (Pillow 12.3.0 with libwebp 1.6.0 and OpenCV 5.0.0).
Marketplaces and platform tools (read 27 October 2026)
- Amazon UK: product image requirements, listing guide (suppressed listings); Amazon Seller Forums, Seller Central Europe: automatic main image check (read 26 October 2026)
- eBay UK: adding pictures to your listings, picture policy; Etsy: requirements and best practices for images, how the listing image requirements apply
- Shopify: product media types and sizes, media editor, media generation and Color background, AI-powered tools; Google Merchant Center: image requirements (read 24 October 2026), image link: formats and AI metadata (UK help), Product Studio
- OnBuy: Seller Terms v3.0.0 (6.2.9 e), API documentation (image size and formats); Not On The High Street: partner FAQs; Vinted UK: catalogue rules
- Transparent images shown wrongly (Shopify Community): black background in Google Shopping, PNG converted to JPEG, grey background instead of transparency
Ordering photos: prices and services (read 27 October 2026)
- Cut-out service: Clipping Expert Asia, pricing (USD); “on white” studio: productphoto.com, on-white product photography (USD); do it yourself: Canva Pro in the App Store UK (in-app purchases, GBP incl. VAT; link under Canva above)
- marszalstudio: prices and services from our pricing page, the packshot page and the ordering app, excl. VAT, in euros converted from the studio’s price list in Polish zloty (27 October 2026); the 255 check before delivery is the studio’s own procedure