In the world of product photography, light box photography has become synonymous with quick, consistent results on a clean white background. Whether you're an e-commerce seller photographing jewelry from home or a small business owner building a product catalog, a light tent can get you professional-looking images without a full studio setup. But is it the right tool for your products - and your stage of growth? In this guide, we'll give you the straight answer, based on years of hands-on experience at marszalstudio.
At marszalstudio, we've watched the light box photography category mature rapidly. In 2026, the best units now deliver CRI 95+ ratings, 5,600K daylight-accurate color, and fold flat enough to slip into a laptop bag. That's a different product than the flimsy fabric boxes of five years ago - and it deserves a fresh, honest evaluation.
Check also:
How a Light Box Works - And Why It Matters
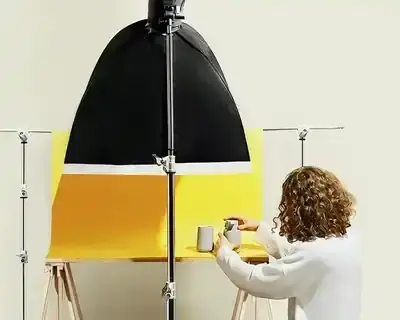
The principle behind light box photography is elegant in its simplicity. Semi-transparent fabric or rigid diffusion panels surround your product on multiple sides. Light sources - either external or integrated LEDs - shine through those panels, scattering the beam into soft, even illumination with virtually no harsh shadows. The result: clean, consistent background shots that e-commerce platforms like Amazon, Etsy, and Shopify actively demand.
A typical light tent consists of:
- Diffusion walls (white nylon or polyester) - scatter and soften incoming light
- Removable backdrops - white for standard e-commerce, black for dark products, colors for creative shots
- Front opening - for your lens, sized to avoid casting shadows
- Frame - foldable metal or plastic skeleton that pops open in seconds
- Integrated LEDs (in modern units) - built-in lighting strips, often dimmable with adjustable color temperature
The terms "light box," "light tent," and "shadowless tent" are used interchangeably in light box photography. Don't confuse a photography light box with a backlit advertising lightbox - they're entirely different tools.
Shutterless Tent With Light - The Plug-and-Play Standard
A light tent with integrated lighting is the solution that anyone new to light box photography looking for speed and simplicity will appreciate. Their main advantage: they are truly plug-and-play. Take them out of the packaging, unfold them, and you're ready to shoot. No external light stands to position, no softbox angles to calculate. The tent handles diffusion automatically - your job is to position your product and dial in camera settings.
A well-chosen unit like the Puluz light box series comes in multiple sizes and ships with LED strips that deliver clean, soft illumination at around 5,500K. Even someone who picked up a camera last month can produce catalog-ready images within the first hour of use.

Best Light Boxes for Product Photography in 2026
The light box photography market has consolidated significantly over the past two years. Here are the models that stand out in 2026, ranked by tier:
| Model | Size | Lighting | Price (approx.) | Best For |
|---|---|---|---|---|
| Orangemonkie Foldio 3 | 25-inch cube | 3× magnetic LED strips, 96 diodes, CRI 95+, 5,600K, ~4,800 lm | ~$139 | Medium-large products, professional sellers |
| Neewer Mega Studio | 32 inches | 3× sliding LED panels, 70 diodes each, 6,000-6,500K, ≥8,000 lm | ~$189 | Large catalogs, high-volume commercial shoots |
| DUCLUS 40×40 cm | 40×40×40 cm | 160 LED beads, dimmable, 5,500K, CRI RA97 | ~$52-57 | Jewelry, watches, cosmetics, small accessories |
| Samtian 16-inch | 16 inches | Integrated LEDs, foldable | ~$52 | Handbags, mixed-size catalogs |
| EMART 14"×16" | 14×16 inches | 104 LEDs, includes color backdrops + phone tripod | ~$50 | Small tabletop shots, beginner setups |
Notice the pattern: the 2026 mid-range sweet spot sits at $50-80 for a complete kit with multiple backgrounds. The professional tier (Foldio 3, Neewer Mega) earns its premium through durability, foldability, and consistent color accuracy across thousands of shots - a genuine return on investment for sellers doing daily catalog photography.
What to Look for When Buying
CRI (Color Rendering Index) - This single specification matters more than any other. CRI 90+ is the minimum acceptable for product photography; at CRI 80, you'll fight greenish or pinkish color casts in every post-processing session. In 2026, CRI 95+ is the professional standard. CRI 97-98 (available in units like the DUCLUS) reduces color correction work substantially.
Color temperature - 5,500K-5,600K is the daylight-balanced sweet spot for most product photography. It keeps whites neutral and metal tones vivid. Avoid fixed warm-white LEDs (below 4,000K) unless you specifically want a warmer feel. Adjustable range (3,200K-6,800K) is the professional choice when shooting multiple product categories.
Dimmability - Essential. Matte products can take full power; shiny, reflective items (glass, chrome, lacquered surfaces) need reduced intensity to avoid hot spots. A box without dimming controls forces you to compensate with camera settings alone, which limits your flexibility.
Size rule - Your product should occupy no more than 60-70% of the box's interior. Too tight, and the white walls reflect back into the product as a visible "cage." The right breathing room lets light wrap around all surfaces evenly.
Photo Tent Size Guide - Which Dimensions for Which Products
Size selection is the most common point of confusion for first-time light box photography buyers. Here's the clear breakdown:
| Box Size | Best Product Categories | Notes |
|---|---|---|
| 10-12 inches (25-30 cm) | Rings, earrings, coins, watch faces, small cosmetics, phone accessories | Highly portable; ideal for Etsy sellers |
| 16-20 inches (40-50 cm) | Full watches, perfume bottles, collectibles, small tech gadgets | Most popular all-round size for e-commerce |
| 24-25 inches (60 cm) | Shoes, bags, helmets, medium electronics, bottles | Foldio 3 lives here - the professional's sweet spot |
| 32 inches+ (80 cm+) | Bundles, large home appliances, multiple product arrangements | Neewer Mega territory - high volume, large catalogs |
60×60 cm Light Box
The 60×60 cm tent hits an excellent balance between portability and versatility. It comfortably handles shoes, mid-size cosmetic sets, and most consumer electronics. With a quality LED kit at CRI 95+, you'll capture precise detail and accurate color reproduction - essential for presenting products in a way that converts browsers into buyers.
80×80 cm Light Box
The 80×80 cm format opens up shoe photography, mid-size home appliances, and larger artwork. The extra space allows you to experiment with product arrangement - adding props or multiple items - while retaining even light distribution across the full scene.
100×100 cm Light Box
At 100×100 cm, you're working in territory that overlaps with a compact studio table setup. This size handles larger electronics, small furniture pieces, and complex multi-product arrangements. Note: you'll need higher-output lighting to fill this volume evenly - the integrated LEDs in most consumer boxes start to struggle at this scale.
Light Box Photography Settings - Camera Configuration That Works
Light box photography creates a controlled, predictable environment - one of its greatest advantages - which means camera settings can be locked in with minimal adjustments between shots. Here's what works:
- Mode: Manual (M) or Aperture Priority (Av) - full control over depth of field
- Aperture: f/8 to f/11 - keeps the entire product in sharp focus front to back
- ISO: 100-200 - minimizes digital noise in the clean, controlled light
- Shutter speed: Adjust to achieve correct exposure at your chosen aperture and ISO
- White balance: Manual, using a gray card - LED panels in cheaper boxes can skew warm or cool, and Auto WB shifts between shots
- Format: RAW - maximum flexibility for color correction and fine-tuning in post
- Tripod: Non-negotiable - eliminates camera shake and locks in your composition for consistent catalog angles
Common Problems and How to Fix Them
| Problem | Cause | Fix |
|---|---|---|
| Background looks grey, not white | Underexposure or incorrect white balance | Increase exposure +0.5-1 EV; manually set WB to match LED temperature |
| Shadow under the product | Product resting directly on backdrop | Elevate on a clear acrylic sheet or glass to separate product from background |
| Box walls reflecting in product | Shiny/reflective product surface | Widen the front opening; place black cards just outside the frame to define edges |
| Flat, dimensionless result | All-around equal light removes depth | Turn off one side LED, introduce a small reflector opposite - restores subtle shadow and form |
| Hot spot on top surface | Top LED panel too bright | Add a layer of diffusion paper over top panel, or dim it independently |
Photography Tents Without Built-in Lighting
Tents without integrated LEDs - like the Lastolite Ezybox range - are genuinely useful, but they require significantly more from the photographer. The white diffusion walls become your softbox material; you provide the light sources externally (speedlites, LED panels, or continuous lights).
At marszalstudio, we consider full lighting control fundamental to professional product photography. When you have studio-grade lights, the tent's frame becomes redundant - you can achieve soft, even illumination with softboxes and reflectors, and you gain the directional control the tent deliberately removes.
Exceeding the Limitations of the Tent
Once you add studio lighting to a tent without integrated LEDs, you're effectively doubling the gear without doubling the capability. The tent forces all light to become diffuse and directionless; meanwhile, studio lights are designed precisely to give you direction, falloff, and contrast control. At that point, removing the tent and working directly with softboxes and reflectors makes more sense creatively and practically.
What Products Genuinely Shine in a Light Box
Light box photography is not a universal solution. Light boxes excel in specific categories and fail badly in others. Knowing the difference saves time, reshoots, and frustration.
Ideal Candidates (Light Box Excels)
Jewelry and watches - Rings, earrings, bracelets, chain necklaces. Small enough to fit in a 40 cm box; even light eliminates harsh reflections in metal. Caveat: for gemstones, the flat diffusion from a light box kills brilliance. A directed studio light with a small accent from above restores that spark. Use the light box for catalog standards; use directional light for hero shots.
Cosmetics and skincare - Tubes, compacts, bottles with matte surfaces. The box's even light makes product labels readable and shadows non-existent. Glass bottles with curved surfaces are harder (see problem categories below).
Small electronics - Headphones, USB accessories, phone cases, portable chargers. Fast, consistent, repeatable. Ideal for high-volume catalog work where you're photographing dozens of SKUs per session.
Tabletop items - Stationery, small books, candles, artisan crafts. The box handles varied shapes and textures without demanding individual light setups per product.
Problematic Categories (Light Box Fails)
Glassware and transparent products - Wine glasses, perfume bottles, transparent packaging. The white box walls reflect as a rectangular panel in every curved surface. Professional technique: backlit setup with black cards placed just outside frame to define edges and create product "pop."
Large shiny surfaces - Cookware, chrome elements, lacquered packaging. The box reflects as a white cage around every curve. Strip softboxes with black cards give you controlled reflections and proper edge definition.
Food photography - Food needs directional light to reveal texture, depth, and appetite appeal. Light box illumination is flat and clinical - the opposite of what makes food look delicious.
Apparel on mannequins - Mannequins require three-dimensional lighting to convey garment structure. The box flattens form and removes the dimensional quality that communicates fit and drape.
Large items - Furniture, large appliances, bicycles. They physically don't fit; and large-format boxes (120+ cm) become expensive and impractical. Backdrop paper with softboxes is the correct solution here.
Light Box vs Professional Studio Setup - The Honest Comparison
This is the question every growing e-commerce seller eventually faces. Here's how light box photography stacks up against a full studio setup in real-world usage:
| Criterion | Light Box Photography | Professional Studio Setup |
|---|---|---|
| Shadow control | Minimal/eliminated (diffuse all-around) | Full control - direction, depth, hardness |
| Lighting control | Limited (diffusion from all sides) | Complete (key, fill, back, accent independently) |
| Dimension/depth | Low - flat, even appearance | High - shadows and highlights create form |
| Portability | Foldable, highly portable | Fixed or semi-fixed setup |
| Cost | $50-190 complete kit | $500-5,000+ (lights, stands, modifiers, table) |
| Learning curve | Low - usable in first hour | Medium-high - light theory required |
| Best for | Small-medium matte products, e-commerce volume | Premium brands, reflective products, brand storytelling |
| Problematic for | Glass, chrome, lifestyle context | Beginners without lighting knowledge |
Light box wins when: you need consistent, fast results for high-volume e-commerce catalogs; products are small to medium, matte, non-reflective; budget and space are constrained; you're building your first product photography setup.
Professional studio wins when: brand identity depends on dimensional, shadow-conscious photography; products are reflective or require emotional storytelling context; you're producing images for print campaigns, not just marketplace listings; scale and product variety have outgrown the box.
Professional Approach to Product Photography
At marszalstudio, we approach product photography with the precision of a craftsman. We carefully analyse each element - product texture, reflectance, brand identity, intended media - and build lighting from that analysis rather than from a preset. A light tent with integrated LEDs is a tempting option due to its ease and speed, but it surrenders the granular control that professional product imagery demands.
In a professional studio, two large softboxes positioned at roughly 45° to either side of the product, with a reflector positioned below or opposite, give you directional, three-dimensional light with full control over shadow depth. You decide whether the product reads as solid, sleek, or tactile - the box makes that decision for you.
While light tents earn an honest place in the toolkit, they're rarely used in high-end commercial product photography. The advanced lighting techniques and photographer skill are what create images that don't just show a product - they sell it.
When a Shadow-Free Tent Works Best
For photographers just starting out in product work, a light box is an excellent learning environment. It removes variables, providing a stable base from which to understand exposure, white balance, and product positioning. Small online shops - particularly those selling on Amazon, Etsy, or Shopify - will find the output meets platform requirements with minimal post-processing time.
The research data supports this: approximately 80% of DIY light box users upgrade to a professional unit within six months, and many progress further to full studio lighting as their catalog grows. Think of the light box as a starting point with genuine utility, not a permanent destination.
How to Choose a Light Box - Key Decision Questions
At marszalstudio, we don't push specific brands. Instead, we give you the decision framework:
- What products will you photograph? - Jewelry and cosmetics need a 40 cm box at minimum with CRI 97+. Shoes and bags need 60-80 cm.
- Do your products have reflective surfaces? - Shiny items require adjustable/dimmable LEDs. Without dimming, you'll fight hot spots in every shot.
- How frequently will you shoot? - High-volume daily use justifies the Orangemonkie Foldio 3 or Neewer Mega at $139-189. Occasional use is well served by a $50-57 DUCLUS-class unit.
- How important is portability? - The Foldio 3 folds to 2.5 inches thick and weighs under 4 pounds. If you shoot on location, portability is a primary specification, not an afterthought.
- What backgrounds do you need? - Most units include 4-8 PVC backdrop colors. Verify these match your brand's visual identity before buying.
The answers to these questions will guide you to the product images that best serve your business - not just the product photography setup that looks impressive in an unboxing video.
DIY Light Box Photography - Build for Under $30
Your own DIY light box can be an inspiring and genuinely cost-effective entry point into light box photography for hobbyists and beginner product photographers. The investment sits at $25-40, the build takes under an hour, and the results are surprisingly capable for simple, matte-surface products.
Materials
- Cardboard box (minimum 40×40×40 cm) - free from packaging
- White tracing or parchment paper - ~$5
- White Bristol board for background - ~$3
- Tape - ~$3
- Two LED desk lamps (5,000-5,500K bulbs) - ~$20 or use existing lamps
Build Instructions
- Cut out the box sides - leave a ~1-inch border frame on both side panels and the top. Remove the front face entirely.
- Cover the openings with tracing paper - tape it taut across each cutout. This is your diffusion material.
- Slide in the Bristol board backdrop - push it from the back, curving it gently to meet the floor in a smooth arc (infinity curve). This eliminates the background/floor seam line.
- Position your lamps - one on each side, aimed at the paper panels, not directly at the product.
- Shoot through the open front - use a tripod for consistent framing.
For larger DIY builds, large sheets of polystyrene foam (available at craft stores) make excellent wall material - they reflect light brilliantly and can be assembled into boxes exceeding what commercial units offer at any price point. The limitation is durability and consistency over time; most photographers upgrade to a professional unit within a few months of sustained use.
An alternative DIY approach uses white fabric - old bedding or sheer curtains - stretched over a PVC pipe frame. This is lighter, more portable, and easier to resize than the cardboard version. Natural white fabric diffuses light in a way that closely mimics commercial tent material. For a deeper dive into DIY approaches, Jimdo's DIY Light Box guide covers multiple build methods with example results.
Consistency Best Practices for Light Box Catalog Photography
The real power of light box photography is repeatability. E-commerce catalogs built using light box photography - with consistent lighting, angles, and backgrounds - convert better than visual chaos. Here's how to lock that consistency in:
- Document your setup - note LED brightness %, background color, camera position, and settings. Photograph a reference card at the start of each session.
- Use the same backdrop color per product category - white for standard e-commerce, black for premium dark products, gray for neutral presentation.
- Lock in your camera-to-product distance - mark the floor with tape if needed. Consistent focal distance means consistent product scale across the catalog.
- Shoot multiple angles per setup - straight-on, 45°, and top-down from the same configuration. Don't dismantle the setup until you have all required views.
- Clean the box interior before every session - dust and fingerprints on the fabric show up immediately against a pure white background.
A Word at the End
Great product photography starts with understanding what your tools are actually capable of - and where their limits live. Light box photography is built around an honest, capable instrument for a specific range of tasks: small to medium products, matte surfaces, high-volume e-commerce catalogs, controlled white backgrounds. It does those jobs efficiently and at a price that makes it accessible to anyone starting out.
What it doesn't do is replace the creative and technical depth of a properly lit professional setup. When your products demand dimensional lighting, reflective surface control, or brand-narrative imagery - that's when the conversation moves beyond the light box and into the studio. Both tools have a legitimate place in professional product photography. The craft lies in knowing which to reach for.
Whether you're starting with a DIY cardboard box, investing in a Foldio 3, or bringing your products to a professional studio, the artistry of photography is ultimately expressed through the skillful manipulation of light, shadow, and angle - the light box just gives you a reliable, repeatable place to begin that journey.