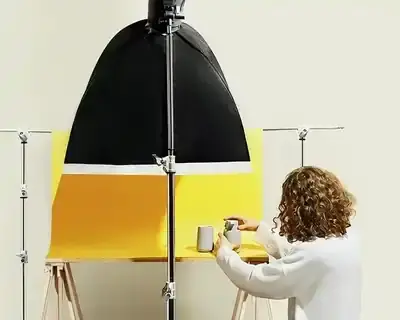
To blur the background in a photo, shoot in Portrait mode on your phone, or use a wide aperture and plenty of distance between subject and background on a camera. For a photo you have already taken, use Depth Control in the iPhone Photos app, the Samsung Gallery, Snapseed, Lightroom, Photoshop, Photopea or Canva.
Below you will find each route with the exact menu names (checked on 11 November 2026), the edges where software usually fails and a calculation showing how much blur the distance to the background gives you.
Which method suits you? An overview
The weak spots at edges come from our product photography work, where errors show up the moment a shopper zooms in.
| Device or app | Where | On photos already taken | Cost* | Weak spots at edges |
|---|---|---|---|---|
| iPhone | Camera > Portrait; Photos > Edit > Depth Control | Portrait shots yes; from iPhone 15 (not 16e) also photos of people, dogs, cats | built into iOS | hair, glass, gaps like a mug handle |
| Samsung Galaxy | Camera > PORTRAIT; Gallery: Background blur | Portrait shots yes; other photos only with people or animals | built into One UI | hair, fur, stray details |
| Google Photos | Edit > Actions (Android) or Tools (iOS) > Portrait Blur | Yes | built into the app | soft transitions at outlines |
| Snapseed | Lens Blur | Yes | free, no ads | fine textures |
| Lightroom | Lens Blur, Blur Amount slider | Yes | £11.99 a month (Lightroom plan) | glass; depth map can be refined |
| Photoshop | Filter > Blur > Lens Blur | Yes | £19.97 a month (Photography plan) | halo around the subject |
| Photopea | Select > Subject; Filter > Blur > Gaussian Blur | Yes | free, with ads | halo unless you remove the subject first |
| Canva | Edit > Tools > Auto Focus | Yes | free | hard or ragged edges |
| Camera | aperture, focal length, distance | No | no extra cost | none, the blur is optical |
* As of 11.11.2026; Adobe UK prices include VAT, annual plan paid monthly.
How to blur the background on your phone: iPhone, Samsung and Pixel
A phone has a small sensor and a short focal length, so the background usually stays sharp. Portrait mode estimates the distances in the scene and blurs everything behind the subject in software.
iPhone: Portrait mode and Depth Control
In the Camera app, swipe to Portrait. Tap Depth and drag the Depth Control slider to set how strongly the background blurs. From iPhone 15 onwards (except 16e) you can stay in Photo mode: when the f button appears, iPhone records depth information and you can turn the shot into a portrait later.

To change the blur after taking the photo:
- Open the photo in the Photos app and tap the edit button.
- Tap Portrait and drag the Depth Control slider. A grey dot marks the original value.
- To make a different subject sharp, tap it in the picture (iPhone 13 or later).
- Tap Done. Revert > Revert to Original takes you back to the untouched photo.
One catch for product shots: Apple only describes turning Photo mode shots into portraits for people, dogs and cats (Apple’s guide). With a vase or a perfume bottle, switch to Portrait before you shoot. On iPhone XR, SE and 16e, though, Portrait mode only works when the camera detects a face (Apple: Portrait mode).
Samsung Galaxy: Portrait mode and Gallery
Open the Camera app, tap PORTRAIT, then tap the effects circle in the viewfinder and choose Blur. A slider sets the strength (Samsung: Portrait mode).
Whether the Gallery app can blur other photos, and where, depends on your model and One UI version. Samsung describes Background blur as an edit suggestion: on One UI 8 you open the photo in Gallery and swipe up to see it (Samsung). It only appears for photos of people or animals, not for a product on a table. Save it as a copy to keep the original.
Google Pixel and Google Photos
In Google Photos, open the picture, tap Edit, then Actions (Android) or Tools (iOS), and choose Portrait Blur. According to Google’s editing page, the Blur slider controls the strength whatever camera took the photo.
Three habits that make any Portrait mode more reliable:
- Follow the on-screen distance prompts: too close or too far, and the effect switches off.
- Put plenty of space between subject and background, so the software has less to guess.
- A calm background in a colour that contrasts with the subject gives cleaner edges.
Check also:
Background blur apps: Snapseed and Lightroom
Most apps that blur the background work the same way: without depth data, they estimate distances from the picture itself. A person in front of a wall almost always works; a glass in front of a window rarely does.
Snapseed
Snapseed is Google’s photo editor, and its Google Play listing promises no subscriptions, purchases, ads or watermarks. The tool is called Lens Blur. The November 2026 update adds Depth Lens Blur, according to the listing; use it if your app already shows it. Snapseed on Google Play

Lightroom
Lightroom’s Lens Blur builds a depth map of the photo. The Blur Amount slider sets the strength, and you set what stays sharp: the detected subject or a point you pick. Several bokeh shapes imitate real lenses (see our guide to the bokeh effect).

In the mobile app Lens Blur is a premium feature. You can unlock it with the in-app Premium subscription or the Lightroom plan at £11.99 a month in the UK (Adobe). On a computer, Visualize Depth shows the depth map, and you can fix edge errors there. Lightroom on Google Play
AfterFocus

With AfterFocus you mark with your finger what should stay sharp. The app is now only on the App Store, designed for iPhone (£0.99), its last version dates from 6 December 2016, and it is no longer on Google Play. Today, Snapseed is the better choice.
Check also:
Blur background online: Photopea, Canva and Adobe Express
Blurring a photo in the browser needs no installation. Photopea copies the Photoshop menus and is free with ads; Canva and Adobe Express need fewer clicks.
- Photopea: File > Open, then Select > Subject and Select > Inverse. Apply Filter > Blur > Gaussian Blur, set the amount and click OK. Save with File > Export As > JPG (Photopea tutorial).
- Canva: select the photo, then Edit > Tools > See all > Auto Focus. Blur intensity sets the strength, Focus position chooses what stays sharp (Canva Help). To blur the whole photo or just one spot, such as a face or a number plate, pick Blur instead and use the Whole image or Brush tab (Canva Help).
- Adobe Express: duplicate the photo, cut out the subject on the top copy with Remove Background, blur the bottom copy and line them up (Adobe Express).

Canva and Adobe Express upload your photo to their servers; Photopea does not. For unreleased products or pictures of people, Photopea or an app on your own device is safer. When editing photos online, work from the full-resolution original: the smaller the image, the cruder the edge detection.
How to blur the background in Photoshop
The classic Photoshop route uses a selection, as in the video below:
- Open the photo, select the layer and click Select Subject.
- Choose Select > Inverse, so the background is selected rather than the subject.
- Go to Filter > Blur > Lens Blur or Gaussian Blur.
- Set the strength with Radius and confirm with OK.
This often leaves a light or dark halo, because the filter drags the colours of the edge into the background. The cleaner way: copy the subject to its own layer with Layer > New > Layer Via Copy, remove it from the layer below with Edit > Fill > Content-Aware, and only then blur. Photopea’s tutorial shows the same trick, expanding the selection by 5 px before the fill.
- Gaussian Blur: even and quick, but flat, because points of light do not turn into discs.
- Lens Blur: imitates a lens, with a depth map, focal distance and iris shape. It cannot be applied as a Smart Filter, so work on a duplicate layer.
- Lens Blur in the Camera Raw filter: the same AI feature as in Lightroom, which builds the depth map itself.
Photoshop comes in the Photography plan with Lightroom for £19.97 a month, and you can try it first (free Photoshop trial). If we photograph your products, you can add cut-outs and retouching when you order online: see our photo retouching service.
How to blur the background with a camera
With a camera the blur happens in the lens, with no edge errors. Three settings make the background softer; a wide aperture and a close subject also make the depth of field shallower:
- Wide aperture: a low f-number such as f/1.8 or f/2.8, easiest in A or Av mode.
- Longer focal length: 85 mm instead of 35 mm for the same framing. Telephoto lenses are the classic choice; for small products, a macro lens gives the same shallow focus at close range.
- Distance: get close to the subject and keep the background far behind. For a portrait, try f/2.8, 85 mm and about 2 metres between camera and subject.

How much does distance to the background help? A calculation
A product photography example: full-frame camera, 50 mm lens, product 1 m from the camera, image 6000 pixels wide*. The table shows how many pixels wide a point of light in the background becomes: the bigger the number, the softer the background.
| Background behind the product | Aperture f/2.8 | Aperture f/8 |
|---|---|---|
| 30 cm | 36 px | 13 px |
| 1 m | 78 px | 27 px |
| 3 m | 117 px | 41 px |
| very far away | 157 px | 55 px |
In this example, moving the background from 30 cm to 3 m behind the product makes it about three times blurrier, roughly the same gain as going from f/8 to f/2.8. That matters for product shots: at f/8 about 18 cm of depth stays sharp here (about 9 cm when zoomed to 100%), so a bottle is crisp from front to back. Even at f/8, a background 3 m behind the product is softer than one 30 cm behind at f/2.8.
* Blur disc formula from the Wikipedia article Depth of field; circle of confusion 0.03 mm, or 0.015 mm (about 2.5 pixels) when zoomed to 100%.

Pro tip: With products we would rather move the background further away than open the aperture all the way. At f/2.8 and close range, often only the label is sharp and the cap is already soft.
Check the edges: where software gets it wrong
Where subject and background look alike or overlap, the software guesses. Check these spots:
- Hair and fur: strands melt into the background or end in a hard cut-out line.
- Glass and clear packaging: whatever you see through the glass sits behind it and should be soft, but often stays sharp.
- Thin parts and gaps: cables, stems or the arms of a pair of glasses half disappear, and the background inside a mug handle stays sharp.
- The surface: a table should soften gradually towards the back. Many apps blur it fully right behind the product, which then looks pasted in.

How to check: zoom to 100% and trace the whole outline once. If you spot errors, reduce the blur, as a lighter effect is more forgiving.
If you need styled product photos with a naturally blurred background, we shoot them in the studio with real depth of field: commercial photography costs €47 net per photo with a minimum of five, and a packshot on white starts at €9 net without retouching (price list). You send the products to us.
Frequently asked questions
-
How do I blur the background of a picture on iPhone?
Shoot in Portrait mode, or open the portrait in Photos, tap Edit > Portrait and drag Depth Control. From iPhone 15 (not 16e), Photo mode shots of people, dogs and cats can become portraits too.
-
Can I blur the background of a photo already taken?
Yes. Use Depth Control for iPhone portraits, Background blur in the Samsung Gallery for people and animals, or Snapseed, Lightroom, Photoshop, Photopea and Canva for any photo.
-
How to use the blur tool in Photopea?
Open the photo, choose Select > Subject, then Select > Inverse. Apply Filter > Blur > Gaussian Blur and set the amount. For a different blur in each area, use the Blur Gallery.
-
How do I add blur in Photoshop?
Select the subject, invert the selection and choose Filter > Blur > Lens Blur or Gaussian Blur. For automatic depth, use Lens Blur in the Camera Raw filter, which builds a depth map itself.
-
How can I blur the background of a photo for free?
Snapseed is free with no ads or subscriptions, Photopea runs free in the browser with ads, and Canva Auto Focus is free. iPhone and Samsung tools are built in.
-
Can you blur a video background?
Yes. On iPhone 13 and later (not 16e, 17e or Air), Cinematic mode blurs the foreground and background while you film, adjustable later in Photos. Many Galaxy phones offer Portrait video.
-
What is the best free online photo editor?
For blurring a background, Photopea is the most capable free option because it copies Photoshop tools. Canva is simpler, with automatic subject detection in Auto Focus.